Killer Panda - Z370 X Code

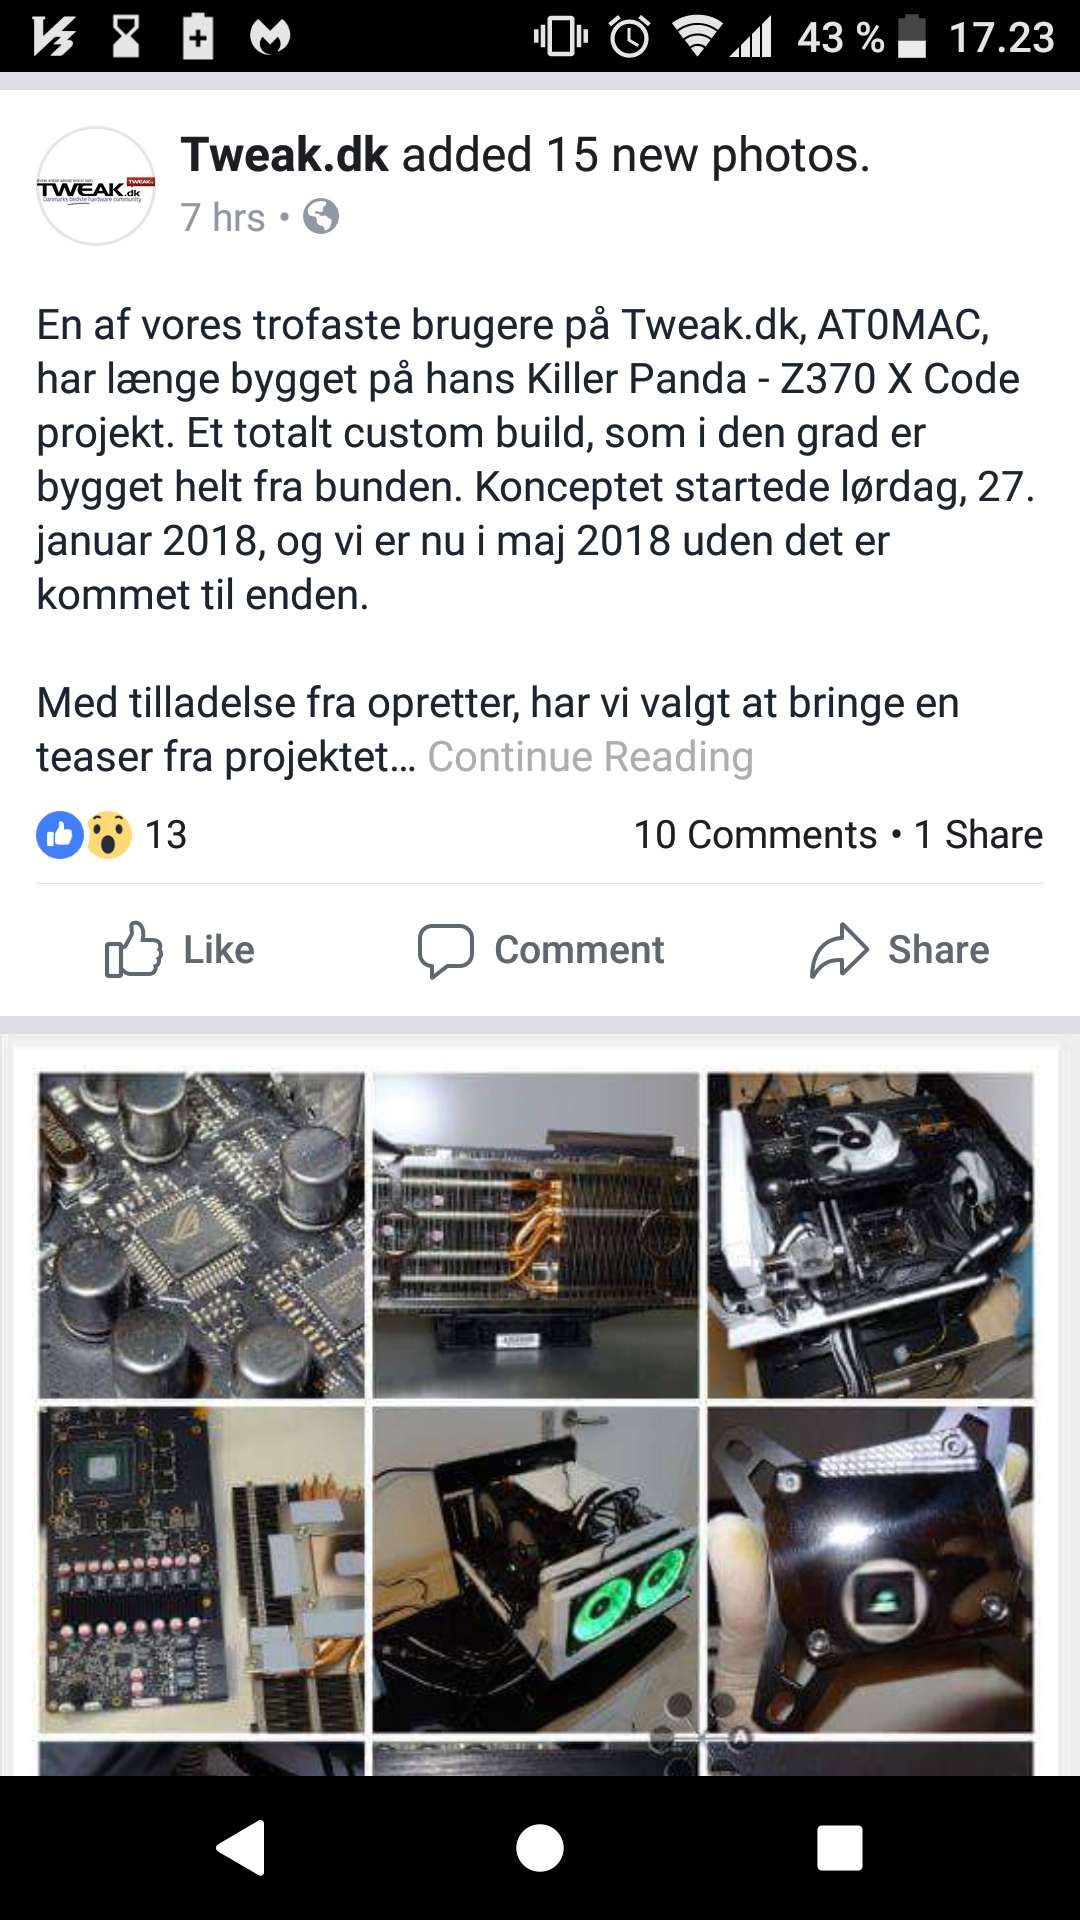
  • Må Tweak.dk dele dine billeder mv på vores Facebook gruppe


    Det må Tweak.dk gerne :goodpost:


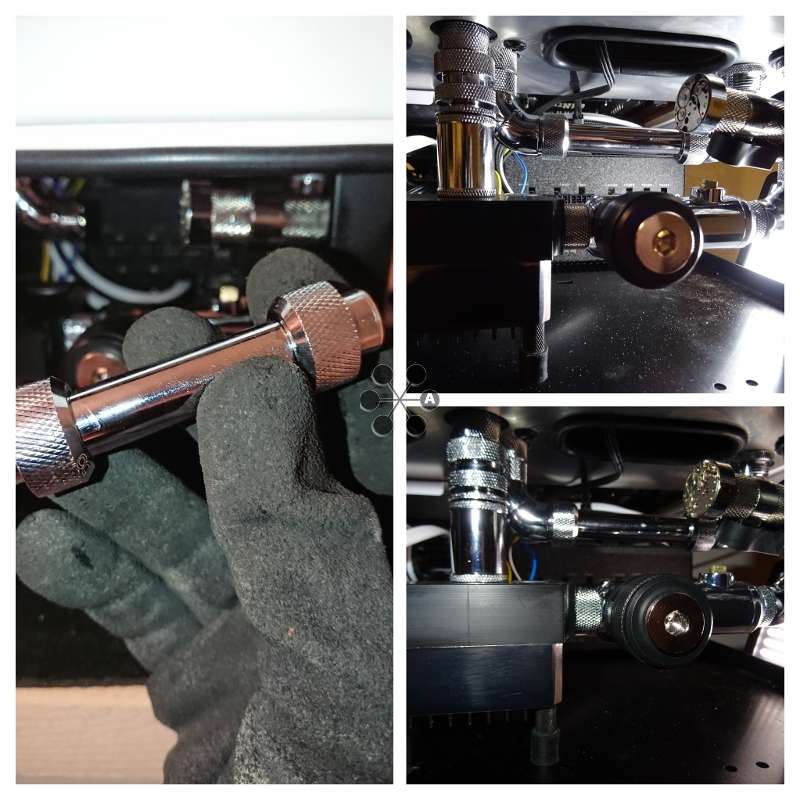
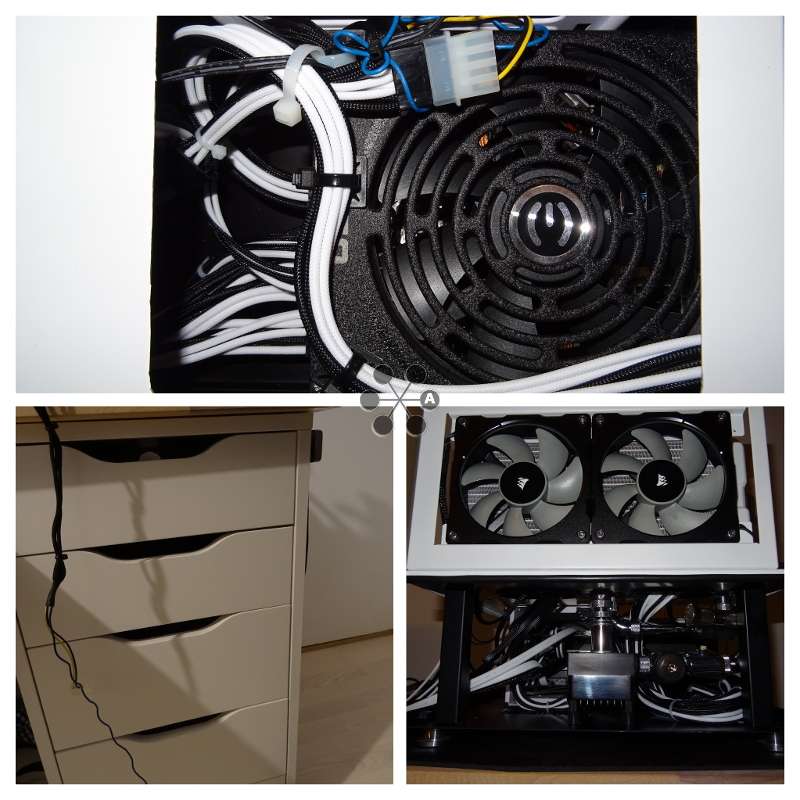
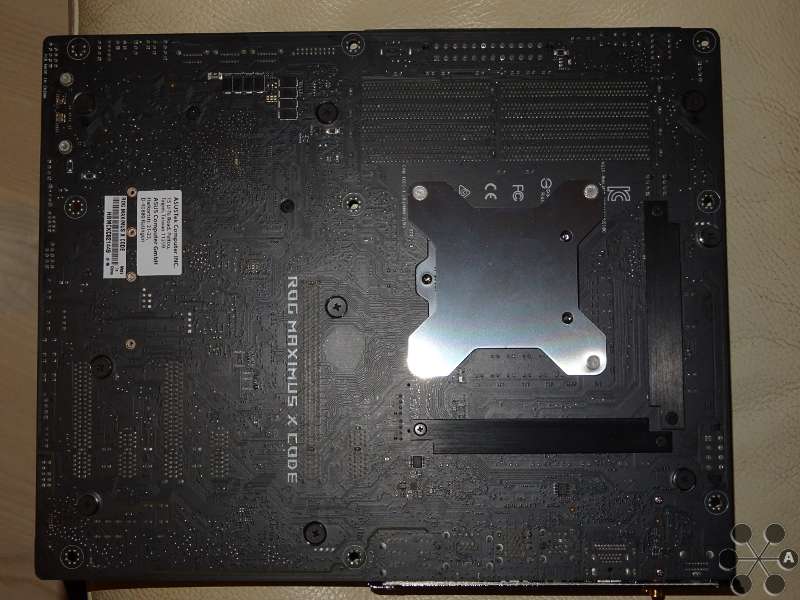
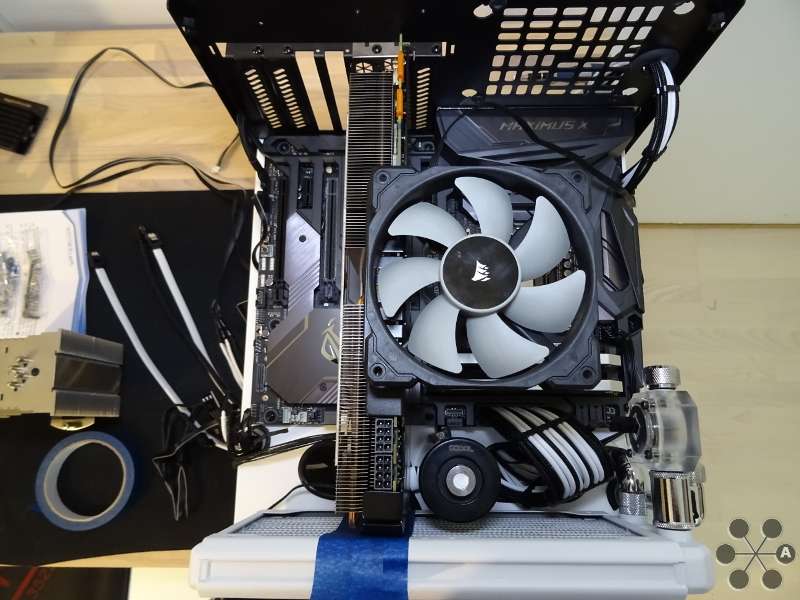
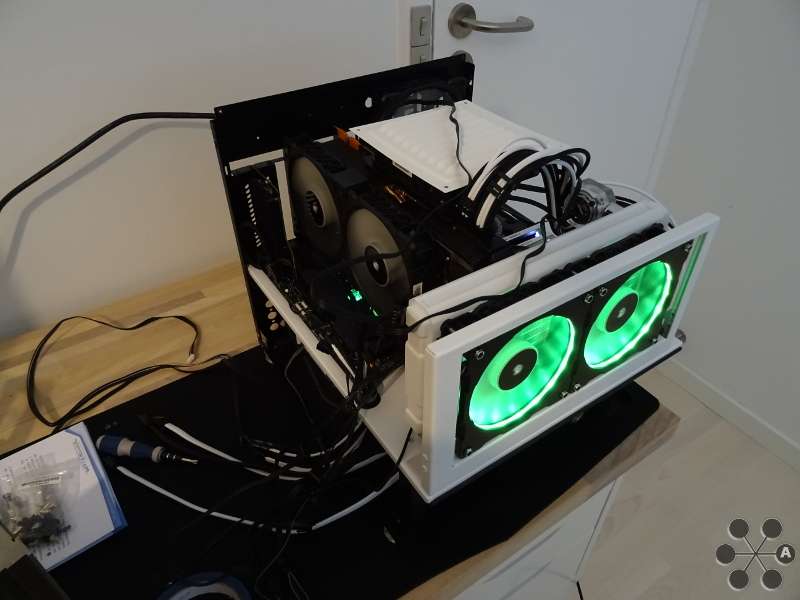
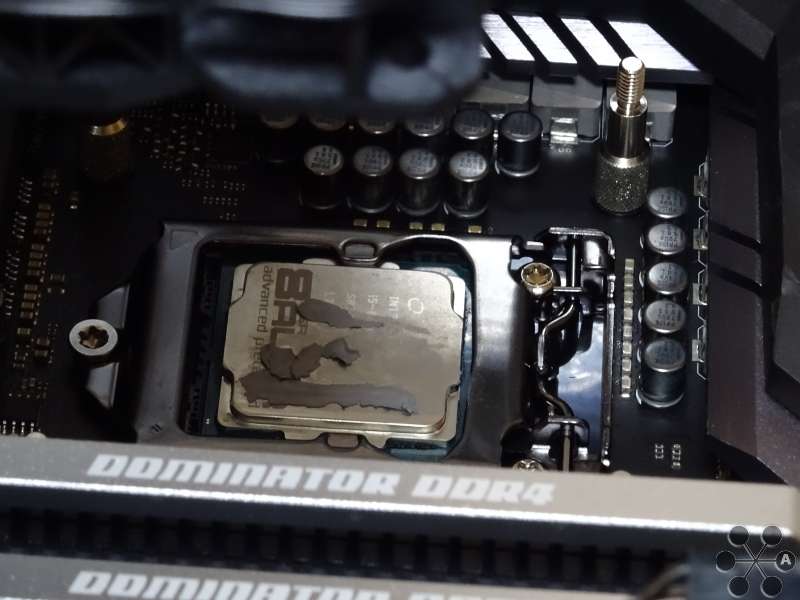
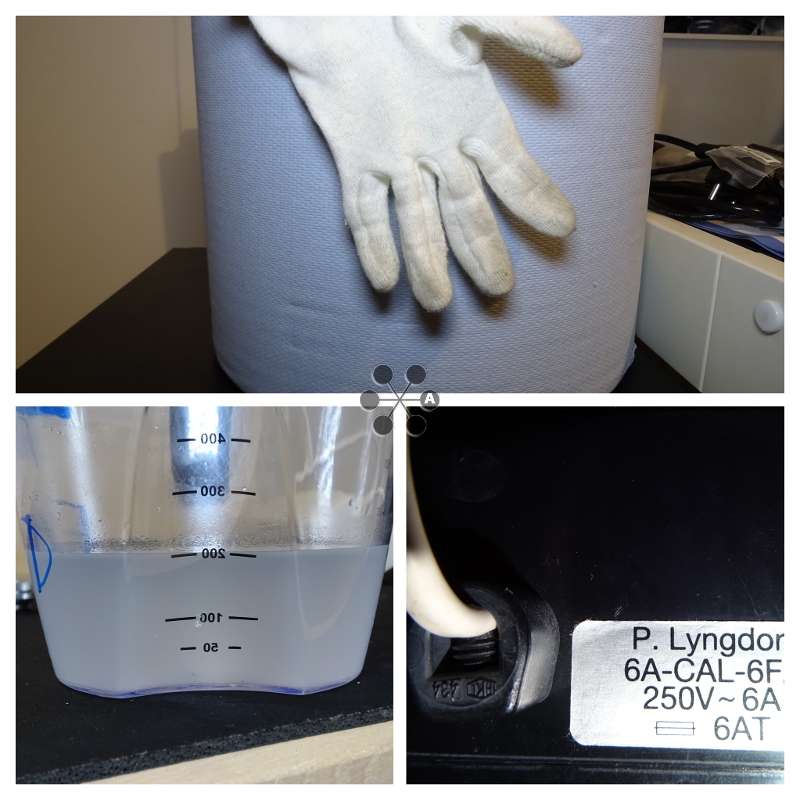
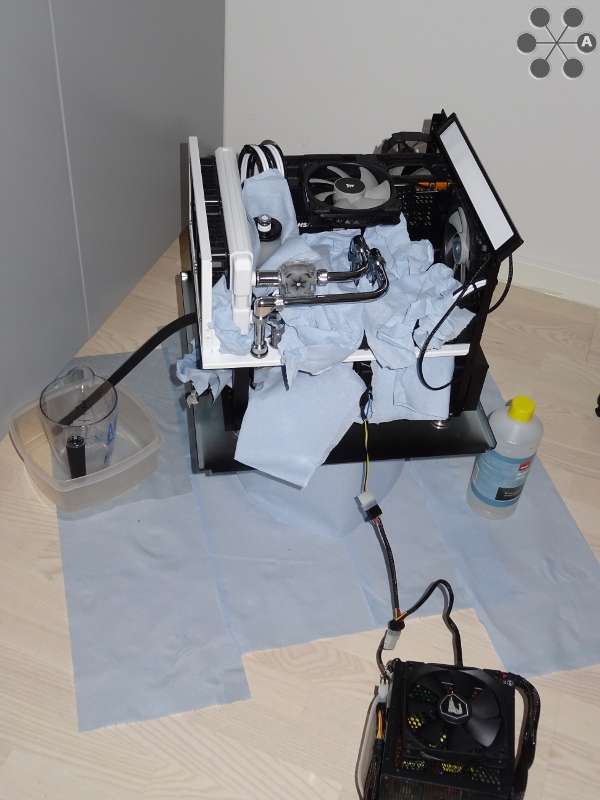
    Jeg lover at billederne snart bliver meget mere prima kvalitet, men at stille tingene nydeligt op når man har fingrene i maskinrummet er bare ikke helt sagen


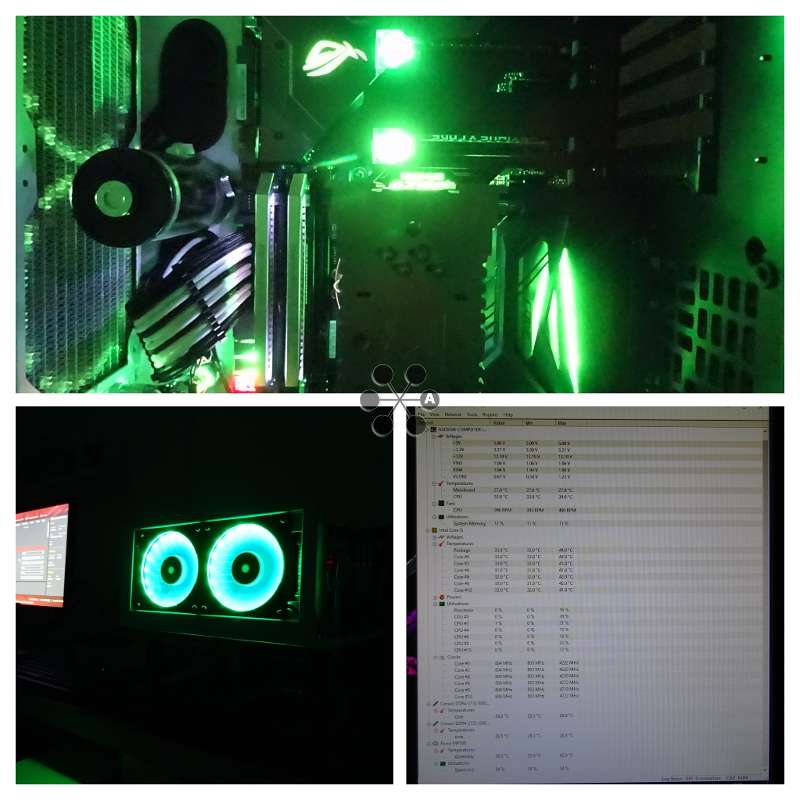
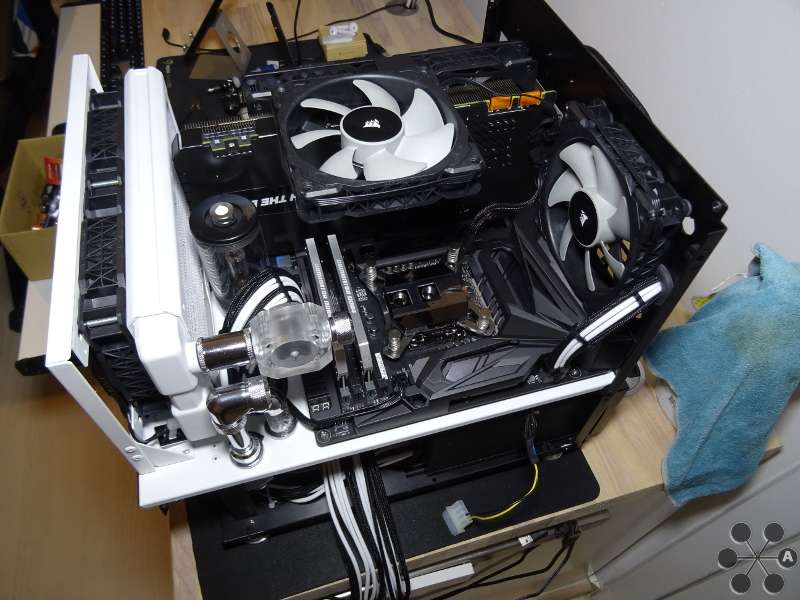
    Jeg håber jeg idag får styr på noget cable management og det skulle i den grad hjælpe på kvaliteten

  • Don't worry, I'm still here.
    Things I do now takes soo long time and can barely be seen what I have done.


    Last night I ended up working 3 hours doing the pipe connecting my rad outlet to my res inlet, that small piece was super difficult!
    I wish I had used soft tubing but damn these chromed pipes look soo good!


    [Blocked Image: http://imagizer.imageshack.us/a/img922/9370/AkzkgF.jpg]


    It kind of remind me of the engine room on a big ship or something similar, there is pipes, valves, wires everywhere.
    Very industrial.... If I did not know it, my first guess would definitely not be that its parts for a computer.


    Speaking of wires, I did some wire management in the basement, don't care so much about looks down here, mainly function, the looks is more for up top.
    The wires alone almost looks like i'm building a b*mb - cut the blue or the yellow wire???


    [Blocked Image: http://imagizer.imageshack.us/a/img923/610/3iIvmk.jpg]


    I ended up reusing a 8Pin EPS connectors sleeves, from a old BitFenix extender I have laying around.
    The yellow and blue wires were very noticeable there behind the pump, so for the first long part of the wire its now sleeved in black, so the yellow/blue is only visible if you look trough the hole right below the CPU (invisible when motherboard is installed)


    So you see, that's what I meen, 2 pictures and that's already 3 hours work, we are now down the the nitty gritty details.


    Stay tuned for more!

  • I have a really long work day tomorrow so I don't expect to get anything done on this until earliest friday.
    So I did a little more just now, and now its midnight so I better get to bed.


    Undressed my motherboard


    [Blocked Image: http://imagizer.imageshack.us/a/img924/1922/0zeAnl.jpg]


    Replaced all thermal pads with very high end ones, 14 W/mk 1.5mm


    [Blocked Image: http://imagizer.imageshack.us/a/img923/299/hPqTXy.jpg]


    Mounted my CPU blocks backplate


    [Blocked Image: http://imagizer.imageshack.us/a/img924/915/yptotE.jpg]


    Fired her up with a passive heatsink I have laying around.
    Everything just works so far!


    [Blocked Image: http://imagizer.imageshack.us/a/img922/3365/lH6OS7.jpg]


    Stay tuned for more progress during the weekend.
    Goodnight...

  • Gad vide hvor længe min tråd her har været den mest læste på Tweak? Syntes selv jeg bemærkede det første gang for 14 dage siden eller deromkring, I er godt nok mange der kigger med.


    :rules: :cheers:

    Jeg tror årsagen til at den ligger blandt de mest læste, det er fordi du er den eneste som har gang i sådan et projekt og så er det spændende at følge med i.


    Ville ønske at jeg selv turde rode med sådan noget.

  • Jeg tror årsagen til at den ligger blandt de mest læste, det er fordi du er den eneste som har gang i sådan et projekt og så er det spændende at følge med i.


    Ville ønske at jeg selv turde rode med sådan noget.


    Du har nok ret, jeg er faktisk ret overrasket over hvor død Danmark ser ud til at være gået på det seneste mht. modding og avanceret vandkøling.
    Må være fordi det er blevet så nemt bare at smide LED på noget, købe det rette designede kabinet og en AIO og bang så har man et system der virker uden at skulle tænke for meget over det... Det er bare ikke særligt personligt og unikt...


    Min største frygt lige nu i forhold til mit projekt er når jeg snart smider vand på, om jeg futter det hele af med en læk, eller det faktisk holder vand - so to say.
    Håber jeg finder tid i løbet af denne forlængede weekend til at få færdig gjort noget mere.

  • Just a small notification. Not an actual update.
    There is now more than 12.000 views on the 4 threads I have this build log running on!


    That's kind of crazy...


    Linus Tech Tips: 2.868 views
    Tweak.dk: 3.000 views
    Bit-tech.net: 2.767 views
    Overclock.net: 3.556 views
    ------------------------------------------
    12.191 views


    I know that one of the sites recently asked for permission to post on the sites official Facebook page, but have not done it yet, so all this is definitely getting some attention.


    Hopefully the attention don't die out as I soon am done, a week more or so.


    Stay peaked for a grand finally soon!

  • Hvem elsker ikke en god build log - Håber på at starte på en snart.


    (Hint: Det lugter lidt af LAN og vandkøling)

    Cyberduck
    | Lian Li PC-O11DXL | ASRock PG Velocita B550 | Ryzen 5600X | 4x8GB TridentZ Royal RGB @3600 Mhz | RTX 3080 | Seasonic Platinum 750W | 4T NVME, 1TB NVME | 6TB WD RED HDD | Vandkøling fra EK |

  • Now I know how it must be to work in a R&D department of a graphics card manufacturer.
    I have heavily modded my Zotac Amp Extreme GTX 1070 today, there is not a card like this by any stretch anywhere else until now.


    There will be many pictures today, else it will be difficult for me to show you all the blood, sweat and tears I have been going trough today, been almost working 4 hours on this update.


    ----------> lets get to it


    Started off by drilling holes in my black painted backplate, was pretty scary if it would mess up and rip off the paint but I succeeded.


    [Blocked Image: http://imagizer.imageshack.us/a/img922/8254/XBiPqy.jpg]


    Mounted the Zotac slogan plate back in its place, it kind of fits the build I'm making, I will push the GTX 1070 and 8600K to the limit


    [Blocked Image: http://imagizer.imageshack.us/a/img923/5479/5M4day.jpg]


    New high quality thermal pads, 14 W/mk, mounted


    [Blocked Image: http://imagizer.imageshack.us/a/img923/7734/galPSn.jpg]


    Put a thermal probe on the backside of the GPU, because it's always nice to have some data to see how things are going.
    The yellow tape is kapton tape, made specifically for an application like this


    [Blocked Image: http://imagizer.imageshack.us/a/img922/9726/e44rdb.jpg]


    Cooler Master MasterGel Maker 11 W/mk thermal paste for the GPU
    Im using this because it should have very good spread, there are some micro scratches in my gpu heatsink, and should therefor be ideal for improving the cooling directly on die of my gpu


    [Blocked Image: http://imagizer.imageshack.us/a/img922/7315/qTEd77.jpg]


    Had to figure out how much to use, so did a test mount and clearly used too much, but would not have known if I did not test it out.


    [Blocked Image: http://imagizer.imageshack.us/a/img923/2425/4Eu2rv.jpg]


    Mounted a fan to the top of the backplate, in the holes I started making and threaded, threaded them to have maximum grip for the only 2 screws holding the whole weight of the fan.
    It actually works perfectly! Mounted it with some rubber dampers between backplate and fan so everything should be in check, even vibrations.


    [Blocked Image: http://imagizer.imageshack.us/a/img922/4959/cgXlSD.jpg]


    So now the backplate looks like this


    [Blocked Image: http://imagizer.imageshack.us/a/img923/5940/L9G21t.jpg]


    And the front side looks like this


    [Blocked Image: http://imagizer.imageshack.us/a/img924/3087/YiYT6e.jpg]


    Let me just say it mildly, it took forever to install the graphics card!!!
    I had to even unscrew the bracket plate where the connections are, because I could else not angle it into place!
    Then screw on the backplate after the gpu was back inside the case.
    Dont have any pictures of this process because it was frustrating!!!!


    But the result payed off, GPU is now installed and looks way better than before with improved cooling and improved monitoring (the probe)


    [Blocked Image: http://imagizer.imageshack.us/a/img922/8938/FqemOv.jpg]


    [Blocked Image: http://imagizer.imageshack.us/a/img922/7875/rjjH2g.jpg]


    This is where all my SketchUp work clearly pays off, there is like 1,5mm space between the rad and the back of the graphics card!


    [Blocked Image: http://imagizer.imageshack.us/a/img924/8792/kWJJYH.jpg]


    [Blocked Image: http://imagizer.imageshack.us/a/img922/8905/WSVWmP.jpg]


    [Blocked Image: http://imagizer.imageshack.us/a/img924/2954/ng8bgA.jpg]


    Now the machine looks like this and everything is still so far working!!
    Don't mind the cabling, am nowhere done with that yet.


    [Blocked Image: http://imagizer.imageshack.us/a/img924/6245/fX4Hyh.jpg]


    Ohh yes by the way, AFTER installing the GPU I noticed I had forgot something... The front USB cables!


    THAT was a serious pain in the b-hind to fix, but I am confident it will work next time I get the chance to test it, didnt feel to turn it on right now so actually dont know.


    [Blocked Image: http://imagizer.imageshack.us/a/img923/8001/ugNPCf.jpg]


    Maybe the cable is not complettely in the right angle, and maybe I pinched the internal wires, but whatever if thats the case...
    Lets see if I am lucky yet again and it actually works ;)


    Stay tuned for more "manufacturing", see you later :)

  • Today I did not get as much done as I wanted to, spend a lot of time with my kids instead and enjoyed the weekend.
    But there is some progress, getting closer by the day. My best estimate is that I will be able to finish it off by next weekend at this rate.
    One of my setbacks is that I installed the GPU fans and discovered that because I there opted for the normal plastic version of Phanteks Halos, that means I missed out on the Asus motherboard adapter to control the digital RGBs...
    Did not have that problem on the front fan frames, because I there bought the Lux version that comes including the adapters in the package.
    So yet again I have something on the way from Amazon.


    Let me show you what I did today, sorry some of the pictures are super soft, was charging my battery for the camera and in some places used the phone instead.


    Test fitted the top part, it still fits in its original spot.


    [Blocked Image: http://imagizer.imageshack.us/a/img922/1557/HZ6Otf.jpg]


    As you might notice, I had taped a piece of paper on the underside, so I knew exactly where my new top gpu fan is located.
    So had to make a little vent hole in the top.


    [Blocked Image: http://imagizer.imageshack.us/a/img924/3397/rRHvIe.jpg]


    I wanted to use my biggest rivets, so had to even widen the holes in the vent cover, but it all seems like it turned out like intended in the end.
    The build is more and more getting that sleeper vibe, where you would not expect it to be like this on the inside, if you only seen it from the outside.
    Similar to old cars there have a ton of changes to the engine and drives like a race car, but looks like a trashcan on wheels.


    [Blocked Image: http://imagizer.imageshack.us/a/img922/4607/NdU5QQ.jpg]


    Next up I thought it was about time to install my heatkiller iv cpu block.
    But what was this, there is clearly something wrong with the batch of Hydronaut paste I bought, its extremely hard and can not be spread out at all, not even after I tried heating it with a lighter (before applying it), it actually turned even harder.
    Never used this paste before and damn this might be the last time I try it. Is that normal for Hydronaut?


    [Blocked Image: http://imagizer.imageshack.us/a/img922/7315/BI3c9n.jpg]


    So instead I opted to use my last drop of Kryonaut paste.
    I ended up having just enough for 1 application, one very thin spread all over the IHS.


    [Blocked Image: http://imagizer.imageshack.us/a/img923/831/81s7p6.jpg]


    And then it was time to install the block, it looks soo good... No wonder its considered one of the best blocks for Intel CPUs, the build quality is second to none!
    -don't mind the light scratches on the top part, mine is a B-ware and was quite a lot cheaper, but its only visible with light directly on it.
    The business end is perfectly smooth, very mirror like and could see right into the innards of my camera.


    [Blocked Image: http://imagizer.imageshack.us/a/img923/7971/y1Pllc.jpg]


    So now it looks like this


    [Blocked Image: http://imagizer.imageshack.us/a/img924/6498/e7w9mB.jpg]


    There is not one screw in the build I have not touched, not one surface I have not modified, nothing is let up to chance, it's all over the top calculated and measured but it looks like my plan is actually going to work.


    I just tried lifting the machine and OMG it's extraordinary heavy!!!
    If anything, that's probably the only thing I have not thought of.... Let's see if it has to stay on the table or it will end up in the closed as originally planned, if I can carry it.


    Lets finish off for today with one of the sexier shots, see you next time:


    [Blocked Image: http://imagizer.imageshack.us/a/img924/2916/FG5KqC.jpg]


    :dance:

  • You know the feeling, when a tiny little detail of something keeps you awake at night and is really annoying you.
    Thats what just happened to me now, the rubber dampers on my GPU fan frames were all over the place, not straight and good looking.


    Will never really be seen in the finished build, but I know it's there and its a real eye sore if you catch it.
    Had to do something!


    I have some foam damper I bought many years ago, surprised to see I still remembered where it was. It has a very adhesive backside, so it will stay in place forever!
    Left side is before, right side is after.


    [Blocked Image: http://imagizer.imageshack.us/a/img924/464/Tn1UQ6.jpg]


    So now it looks like this:


    [Blocked Image: http://imagizer.imageshack.us/a/img923/3139/rF5f7v.jpg]


    Notice the 80mm fan on the m.2 SSD cooler?
    I just figured, why not, there seems to be space and I have an unused fan header right there + a crap ton of fans so a little gorilla glue double sided tape, a few zip ties and bam, active cooled m.2!
    This PC will be a really cool machine, literally.....


    Speaking of cool, just took a rather cool looking shot of how it looks right now:


    [Blocked Image: http://imagizer.imageshack.us/a/img922/4031/b6yCrA.jpg]


    As seen from above, its almost 50/50 white/black.


    Now its past 1am at night here in Denmark, better get back to bed, problems solved. Stay tuned for more another time. Goodnight


    :sleeping: :sleeping: :sleeping:

  • You only get 1 picture today:


    [Blocked Image: http://imagizer.imageshack.us/a/img922/9590/EXSDwn.jpg]


    I know it's a bad picture, take with my phone and it totally had troubles with the shinny reflective surfaces and lack of color.


    I have installed tubes!!


    It looks stunning in real life, seriously these chromed brass tubes are so beautiful (never thought I should say that about a computer part).
    Wait and see when I make much better pictures for the reveal...


    Did not have time to play with water today, so that has to wait.


    Stay tuned for more!

  • Today's update is again one of the small ones, not much to say and don't want to reveal too much until its truly done.


    I have played with water!


    [Blocked Image: http://imagizer.imageshack.us/a/img924/4589/ywkj9X.jpg]


    First off, I don't think I told you about my quest to find blue paper towels, that's rather difficult! At least here in Denmark...
    I wanted blue, as it will show up drops of water much more noticeable than a white piece of paper does.
    Ended up getting a 1.000 pieces huge roll off Amazon! I think I have enough for a while now....


    Flushed some distilled water trough the system, just to see if it leaked, and so far no leaks :D
    To my surprise it actually only holds a little above 200ml, like maybe 220ml when totally empty. That's really small!


    Lastly, I don't want to take any chances shorting anything out, so have hooked the power trough a very rare power filter - the P. Lyngdorf 6A-CAL-6F, hand build by Peter Lyngdorf (look him up, he is a rather famous Danish guy in the audio industry, I used to work for him).


    So right now and the coming 24hours my system will run trough Mayhems Blitz Kit Part 2 cleaner, looking like this:


    [Blocked Image: http://imagizer.imageshack.us/a/img922/7687/CnhBLK.jpg]


    The power supply is my old trusty SeaSonic X400FL fanless, just added a fan to see when the power supply have power if the pump is disconnected.


    The rig is humming along at full power, bit annoying but whatever, as long as its for a good cause.
    See you next time for a small update!

  • Kan ikke vente til næste update! :clap: :clap: :goodpost:


    Jeg ville ønske at mange flere i DK gad fremvise deres custom build og at jeg selv turde splitte min PC helt af. :(


    Jeg tror de færreste splitter alt ad ligesom jeg har gjort, skiftet termiske pads på VRM, ombygget min graffikkort køler og komplet ommøbleret mine kabinet dele, men resultatet skulle være det hele værd.


    Du kommer nok til at holde vejret lidt længe, jeg forventer først at være helt færdig med at skylle igennem og få leveret de aller sidste dele på næste mandag.


    :wacko:

  • I just got featured today on Facebook!


    Over at the Danish tech site Tweak.dk


    [Blocked Image: http://imagizer.imageshack.us/a/img922/4895/4wOLn2.png]


    Anyway, beside that I decided to make a public Facebook profile, so I can interact with the commenters there without making it too personal.
    -so if anyone is interested, now you can even follow me on fb! Will at some point throw more stuff there about other crazy projects I do in my spare time, I am an all-round-nerd. I just don't really like their privacy police about ownership of content, so have to pick and chose wisely.


    Rig have now been running Bliz Kit Part 2 for 23 hours and eventually got all the air out, so its actually rather quiet even that its on full speed. Pretty nice.


    About time to empty the rig, no leaks so far, and starting to flush it trough a couple of times.


    //Catch you later

  • Dang it! I just found out I have ordered the wrong RGB motherboard adapter :(
    Its a normal RGB one, not a digital RGB one, like what I need.


    It's being delivered tomorrow but whatever.....


    So I have now ordered a Phanteks Halos Lux fan frame, because I know it comes with the right adapter.
    In the same order is a slimmer 80mm fan for my m.2 cooler, because im fairly sure that the one I put there now, is going to hit the side panel when its back on.
    Also, ordered some different pressure valves, as I actually rather have a black than a silver, and not sure what design I like best, so bought both the Thermaltake and the Alphacool one...


    I still hope for a reveal latest monday or tuesday next week.


    //later