Killer Panda - Z370 X Code

  • Spam slettet? jamen tak for det :9xo


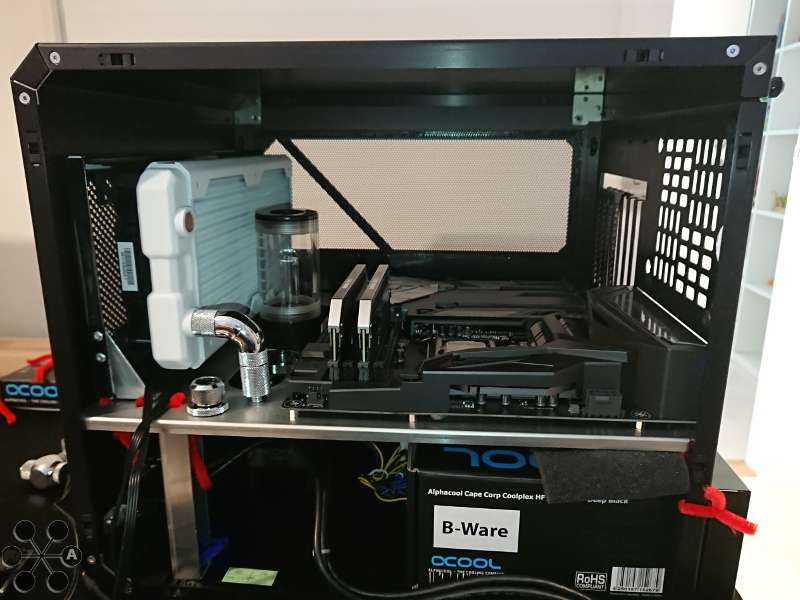
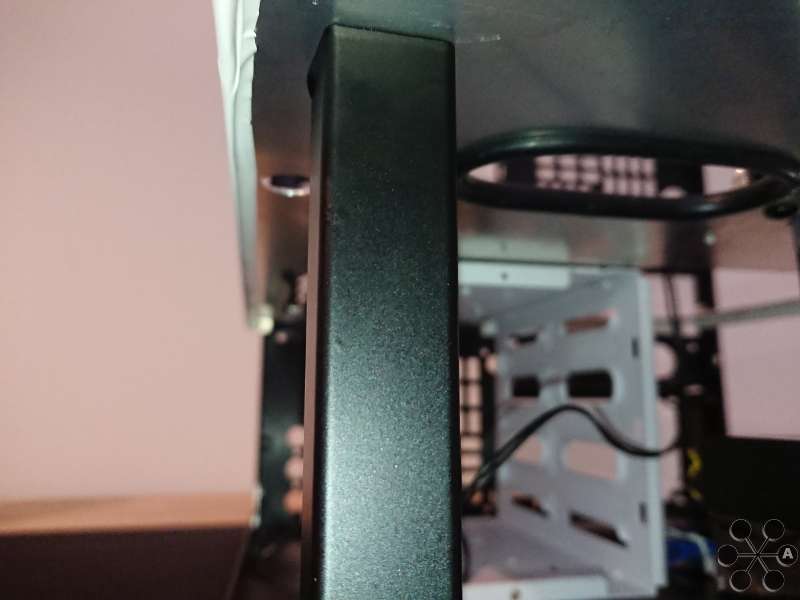
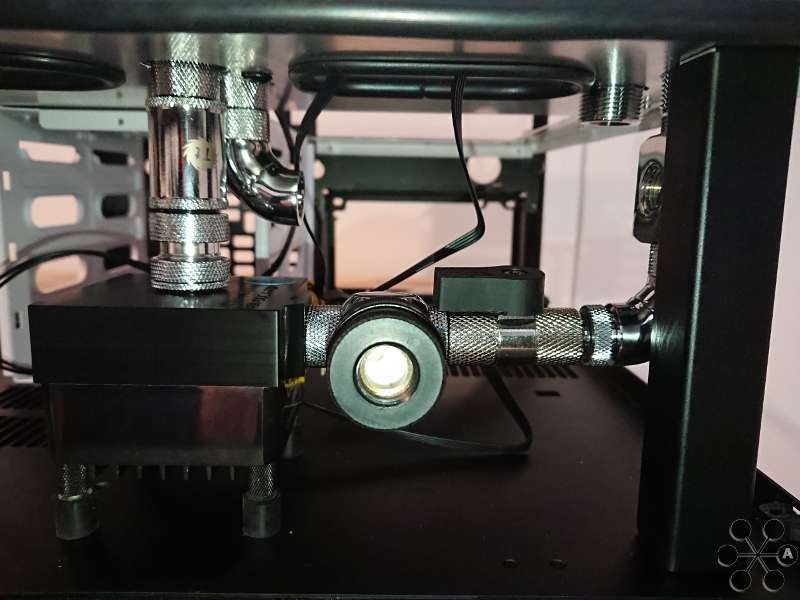
    A minor update, sorry for the slightly soft pictures and weird light, taken with the phone today.


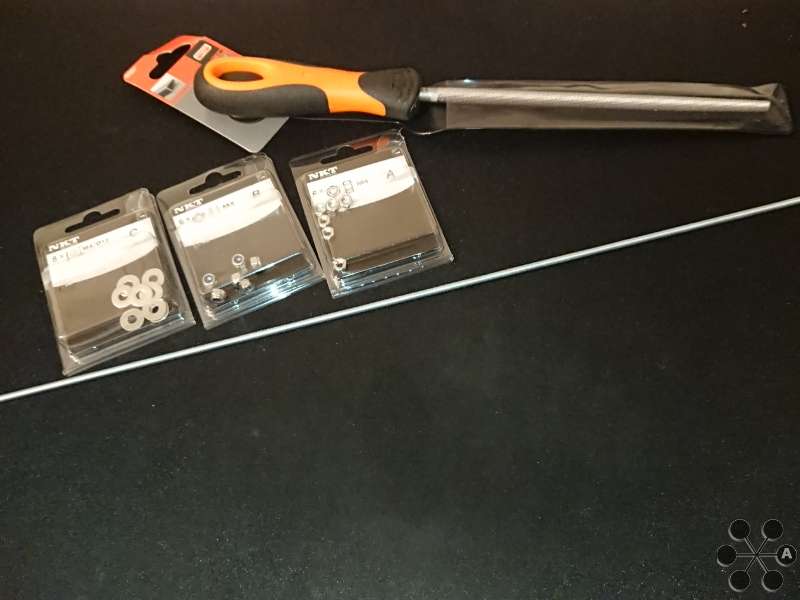
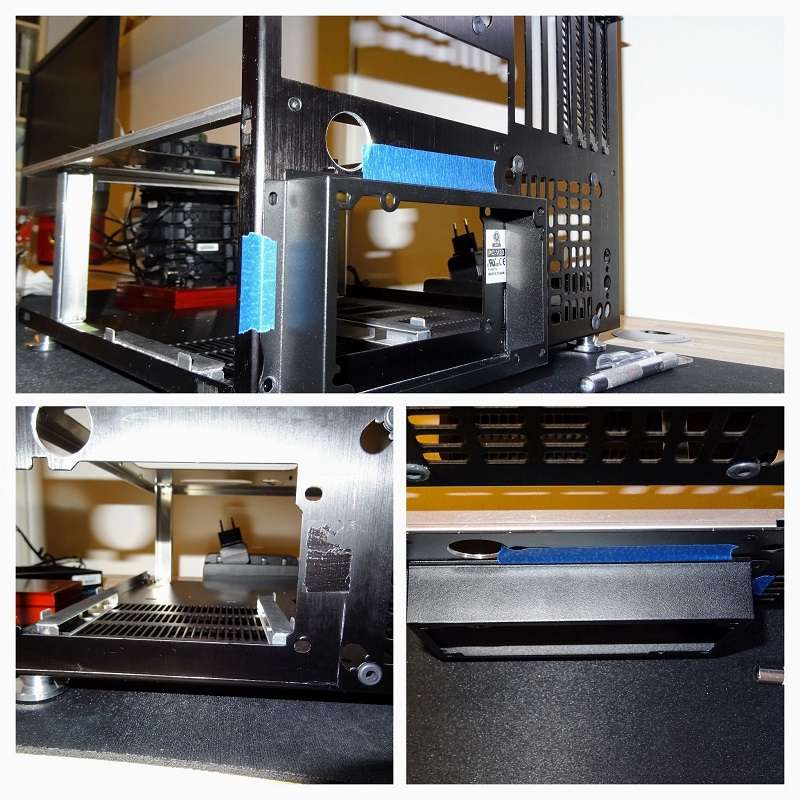
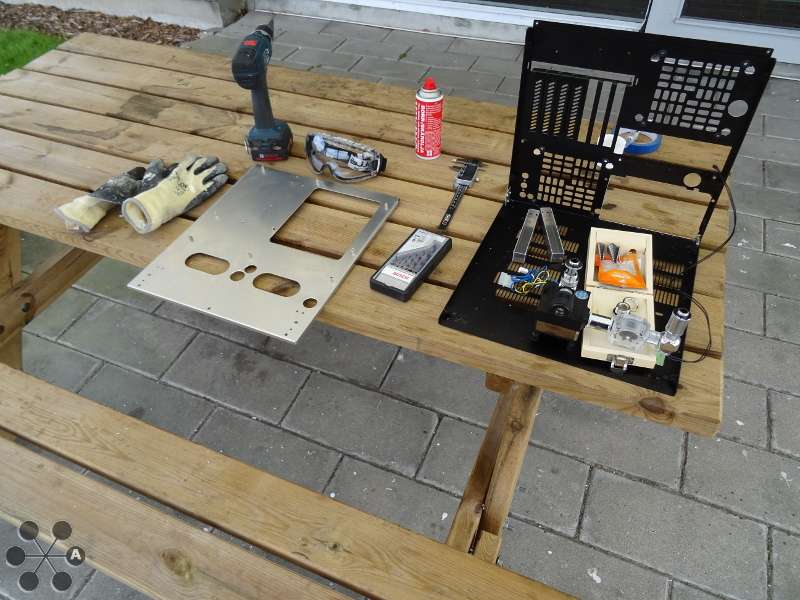
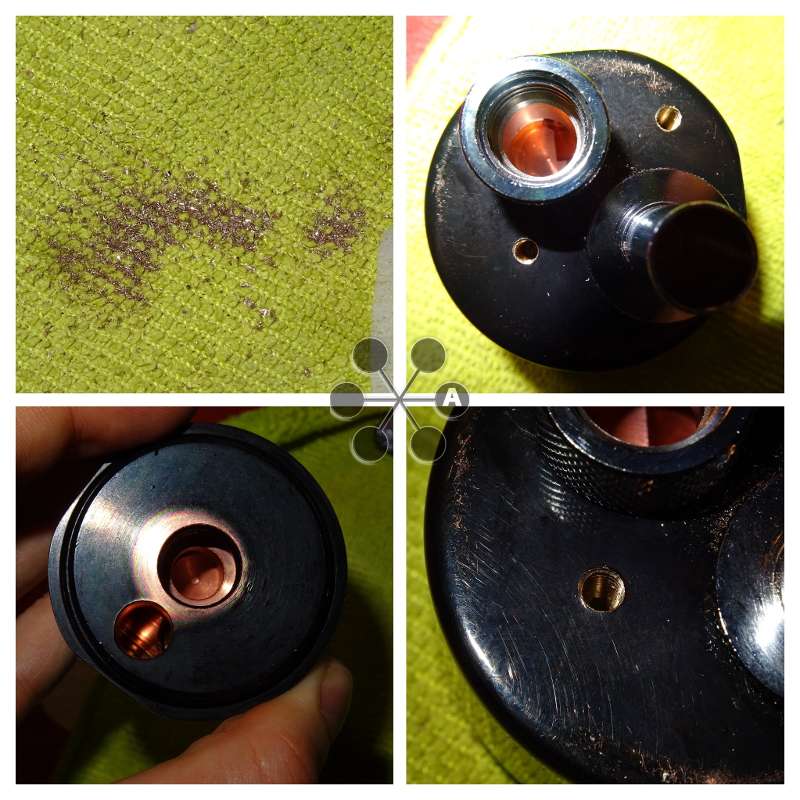
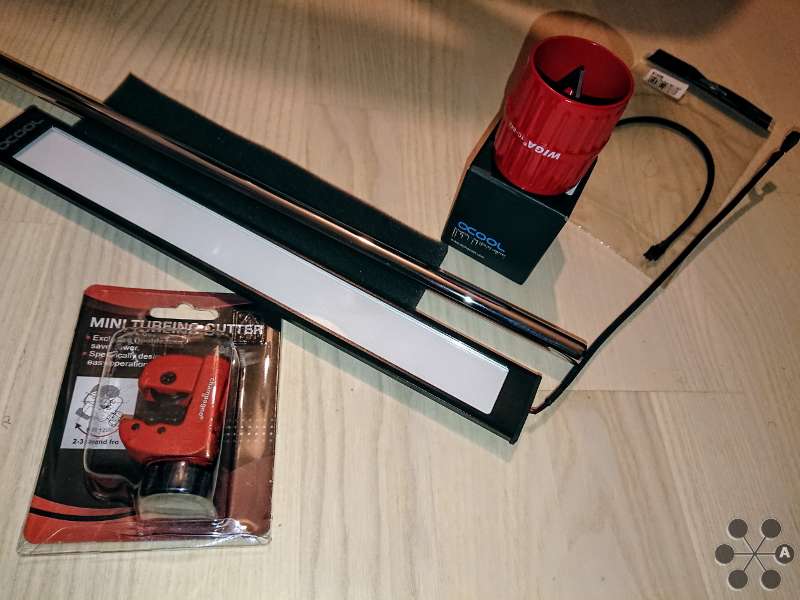
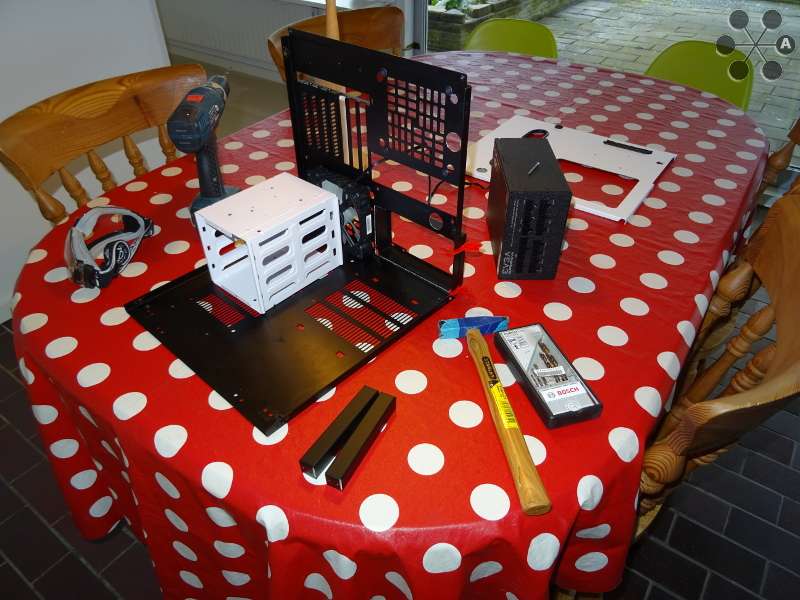
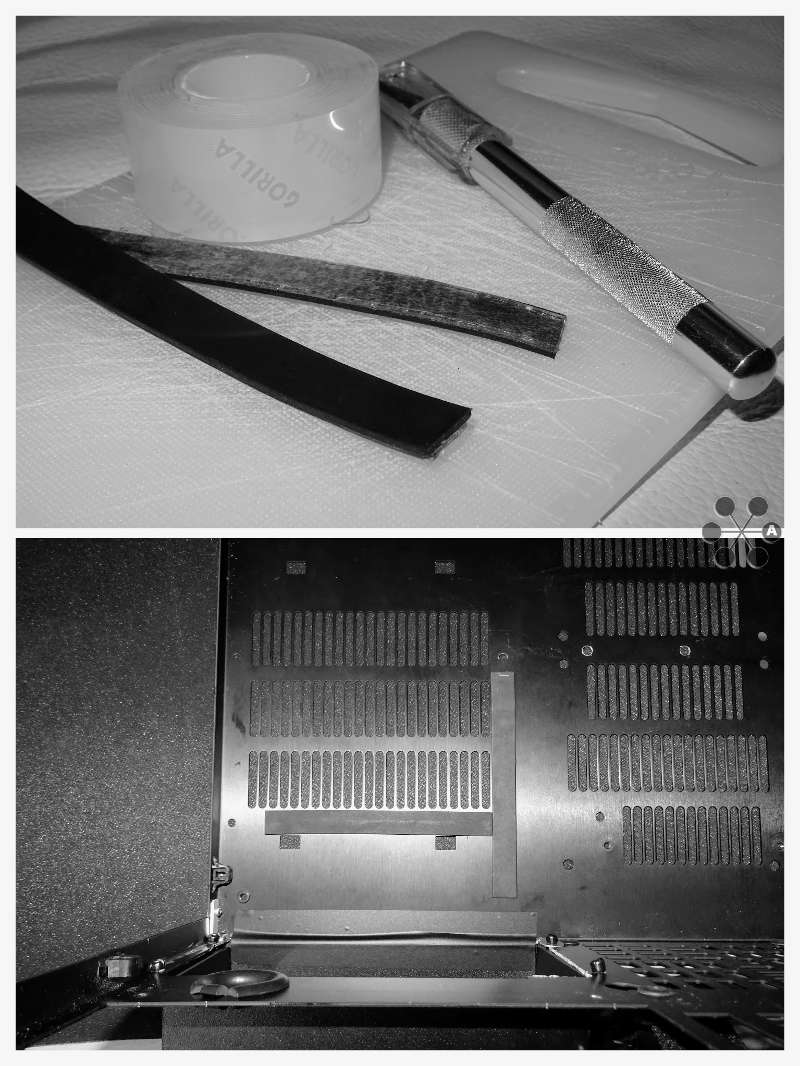
    Could not wait for the caliper to arrive, and was looking around on eBay for radiator screws when it hit me, my rad is using standard M4 thread and I can just as easily make the exact length I need out of a threaded rod!
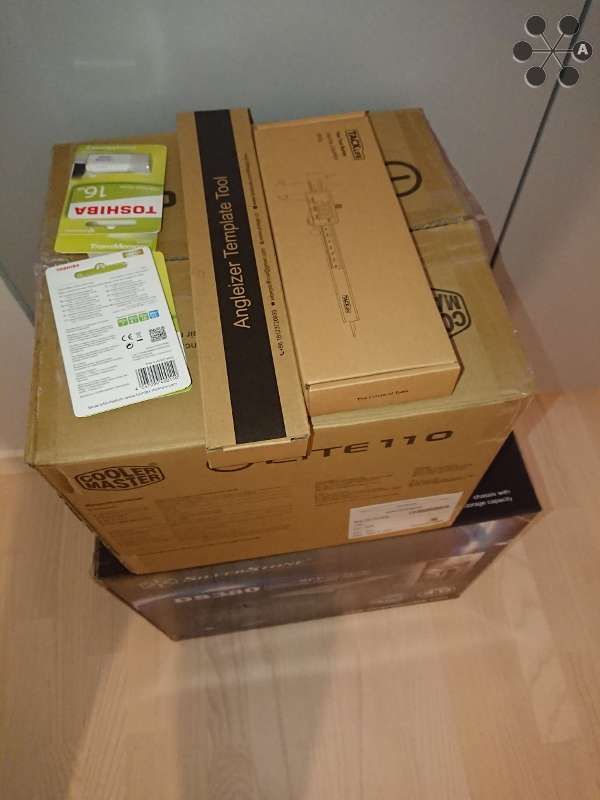
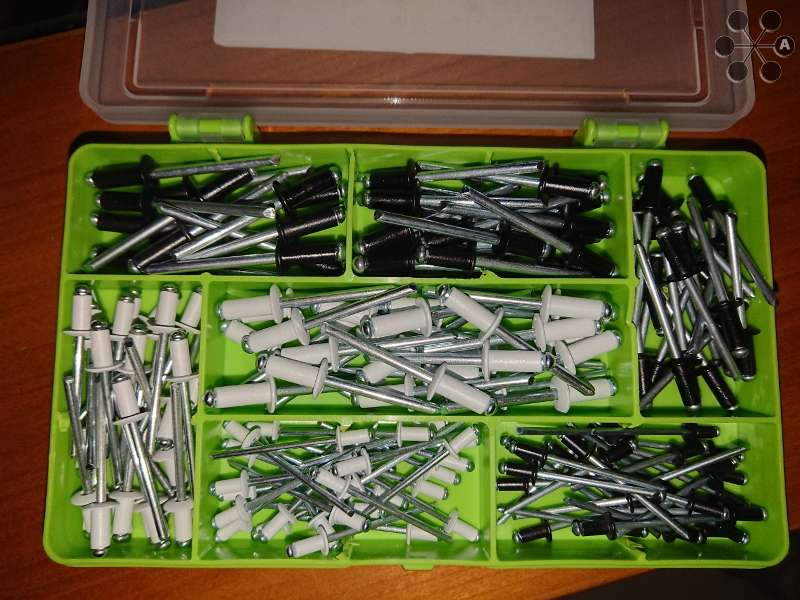
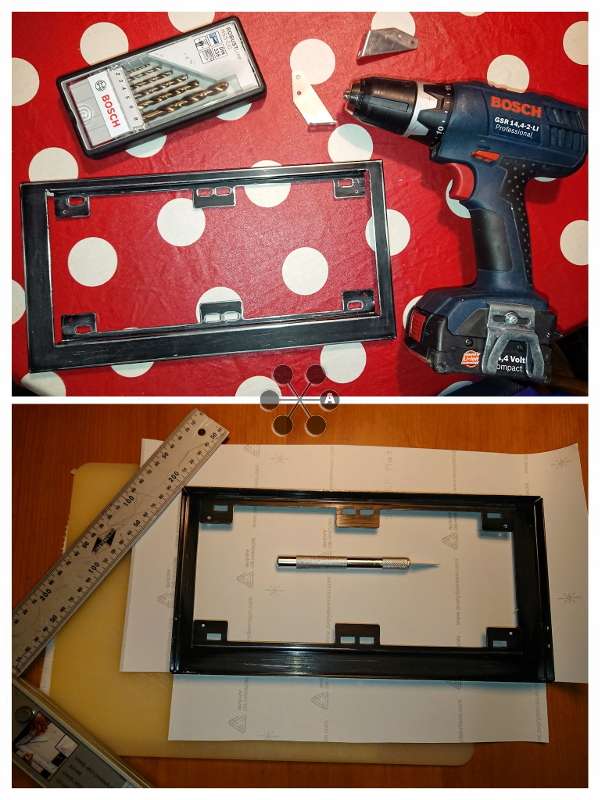
    So me and my son biked to the nearest DIY shop and bought more tools and stuff....


    [Blocked Image: http://imagizer.imageshack.us/a/img922/3176/KQbqEG.jpg]


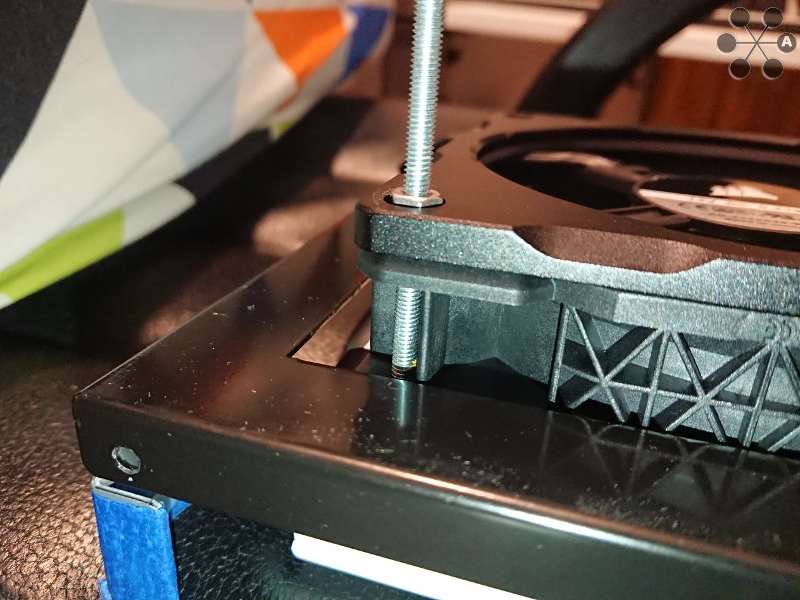
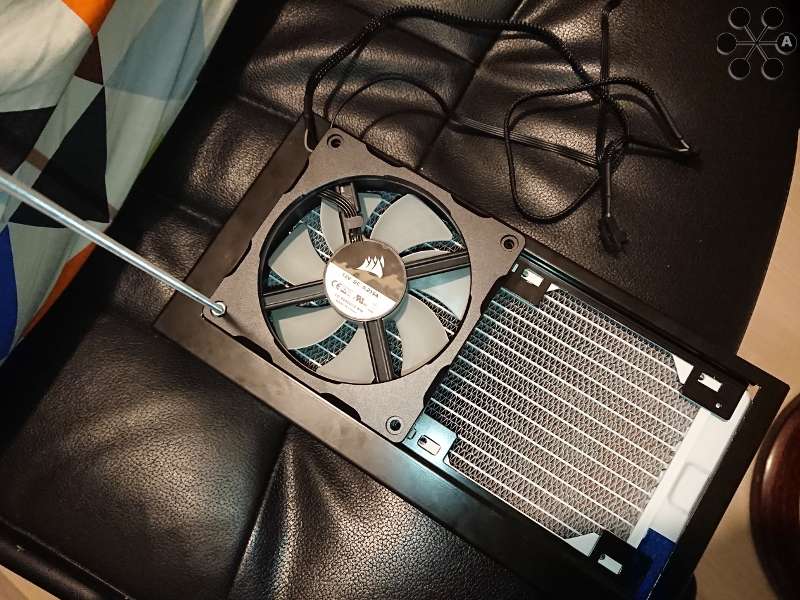
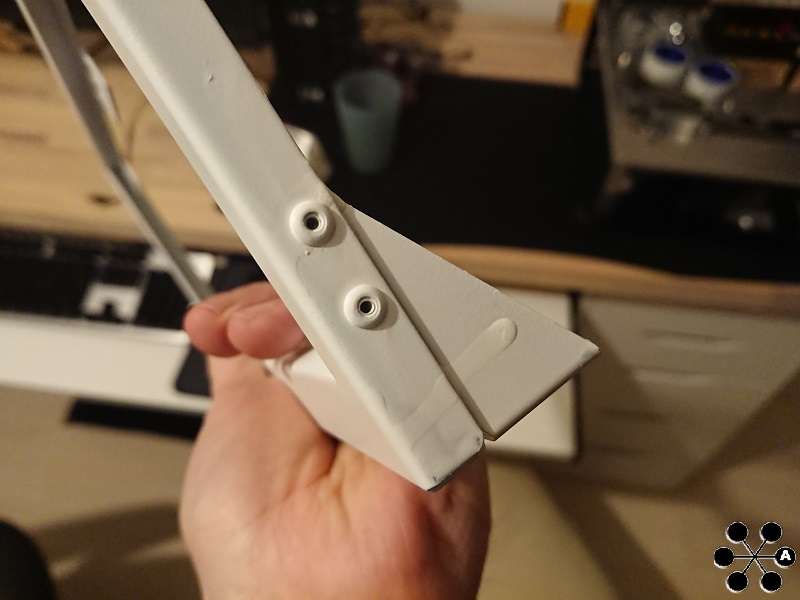
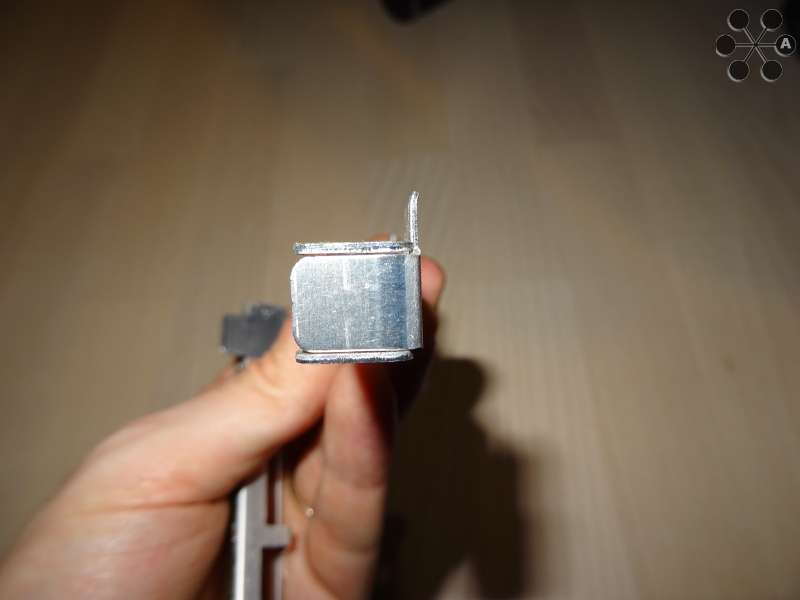
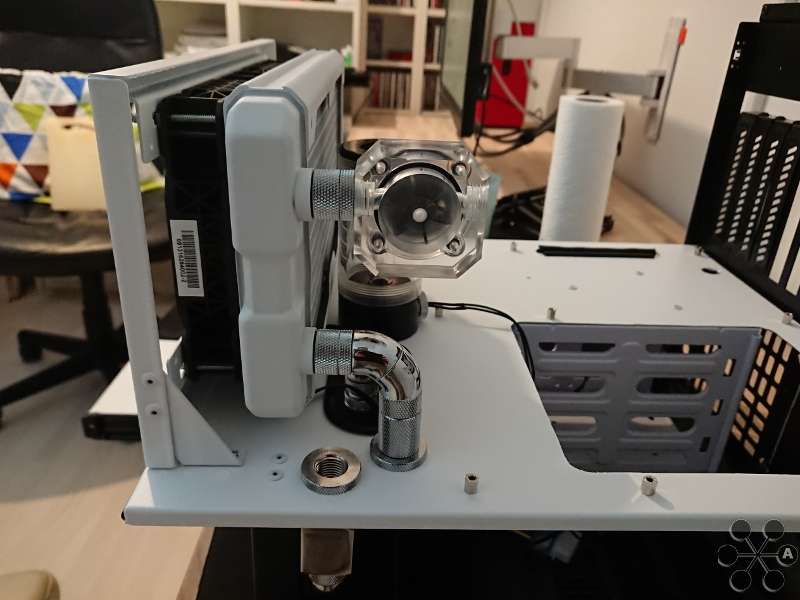
    Just need to adjust some length


    [Blocked Image: http://imagizer.imageshack.us/a/img923/9779/GXgMFS.jpg
    [Blocked Image: http://imagizer.imageshack.us/a/img924/8985/TZgRv1.jpg]


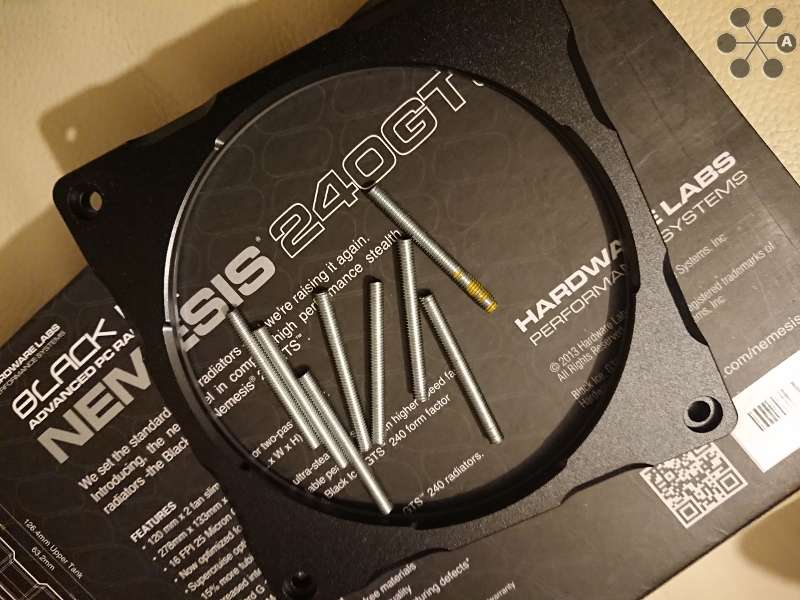
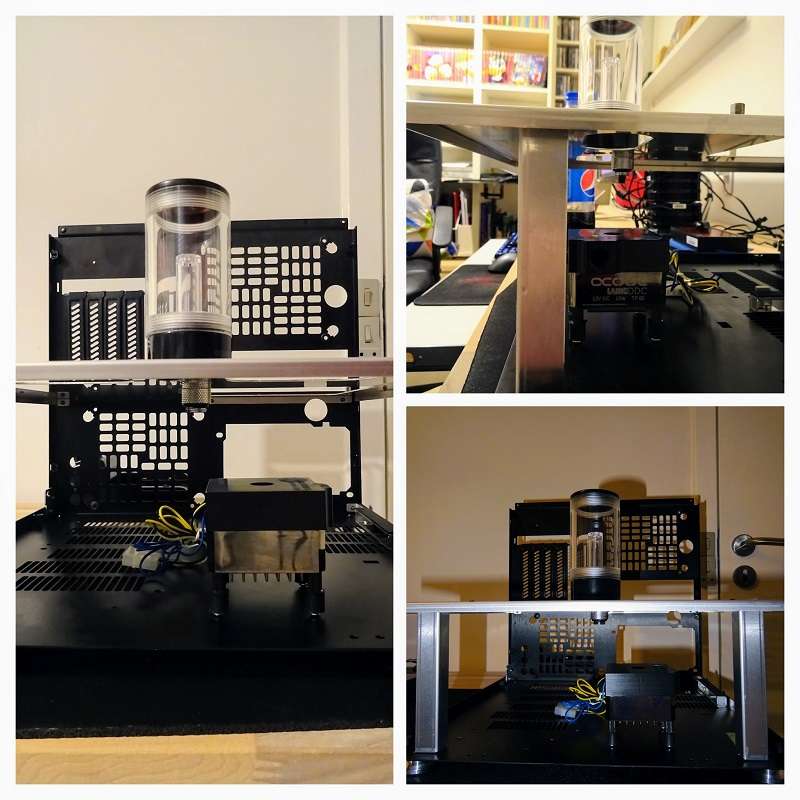
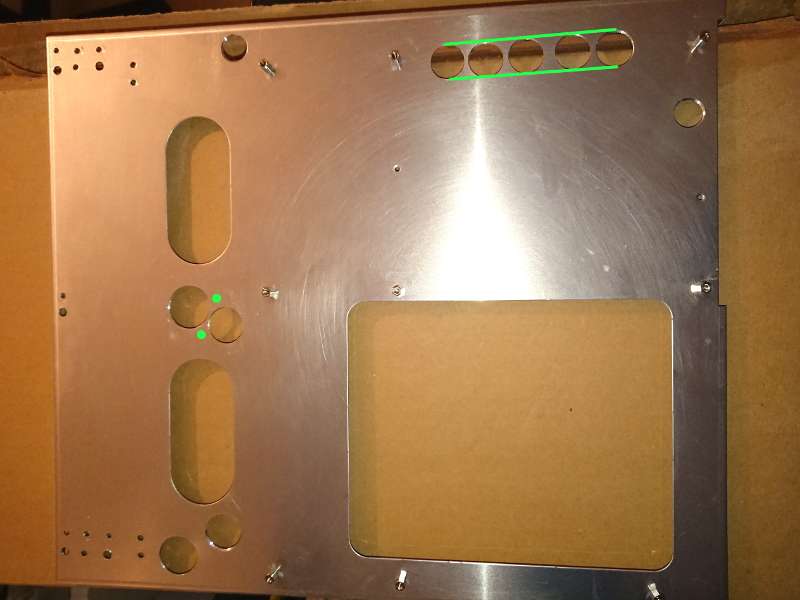
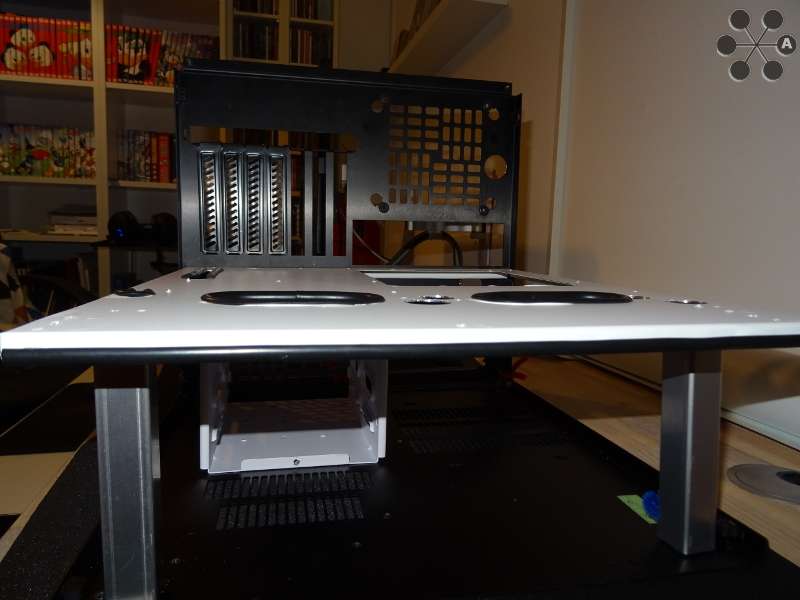
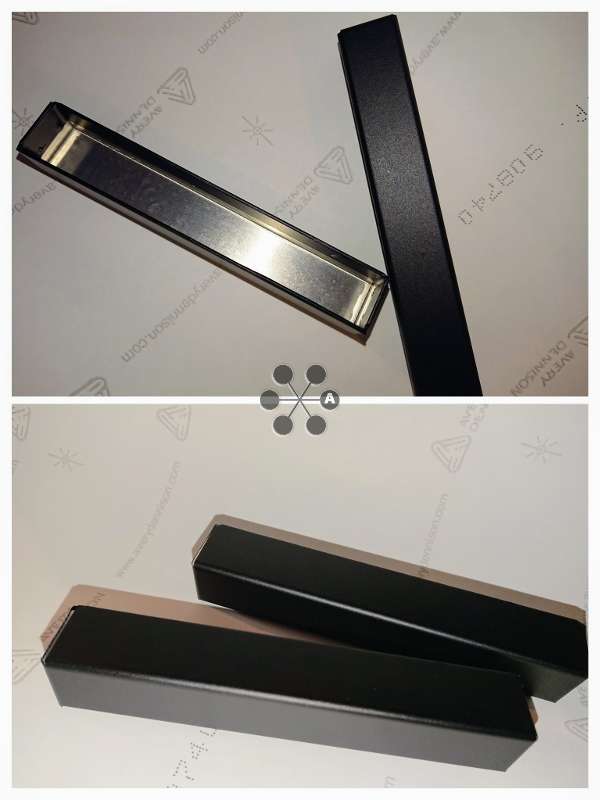
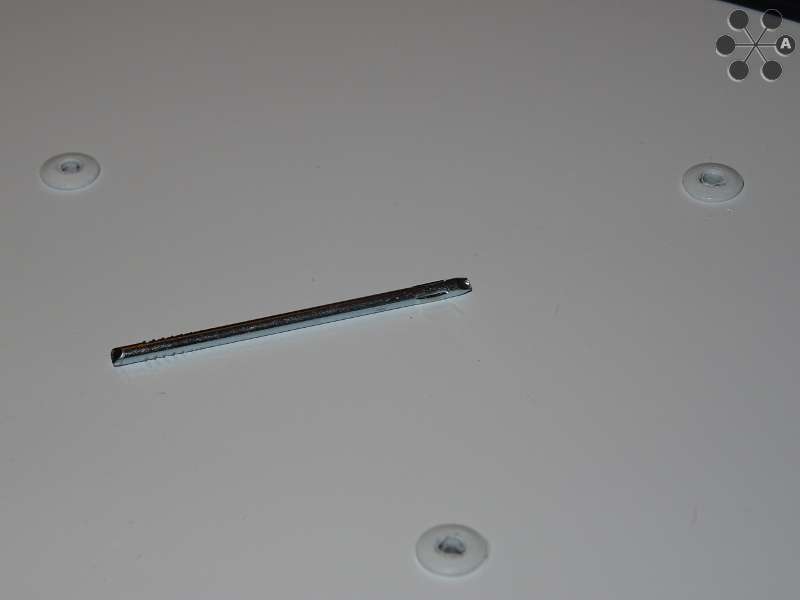
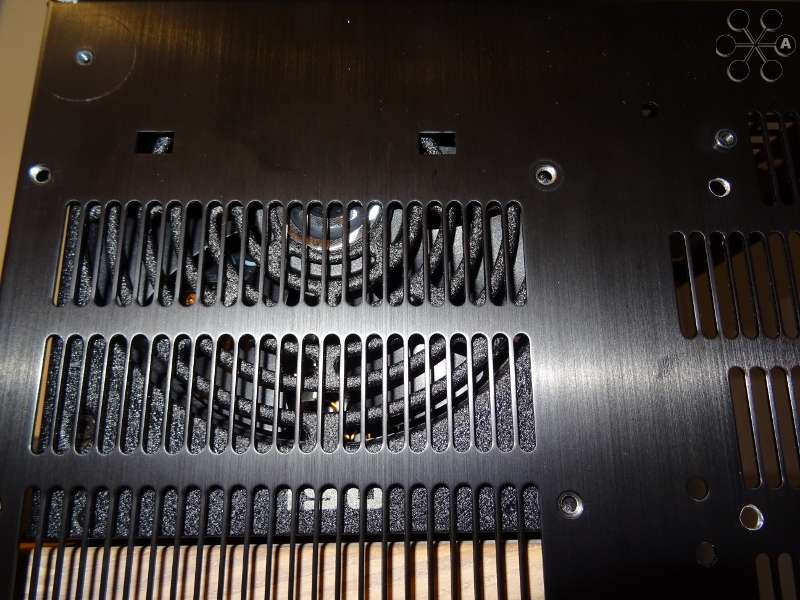
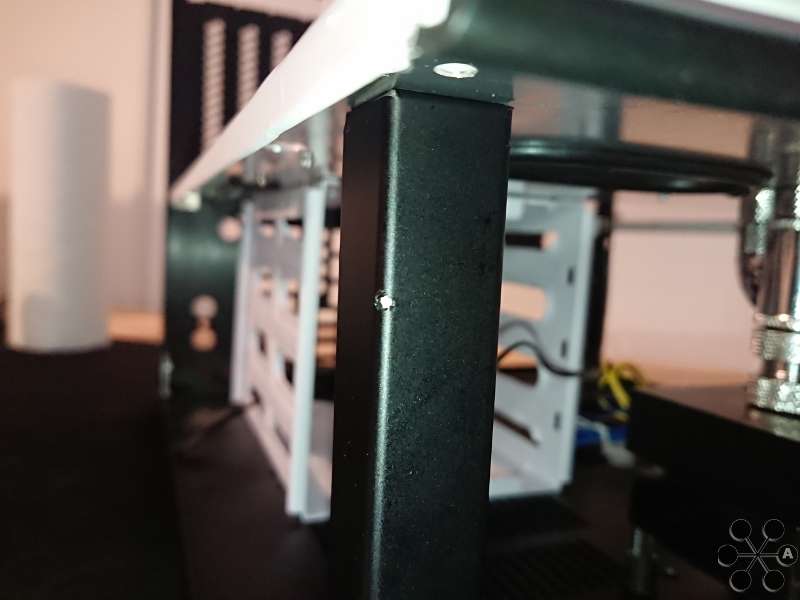
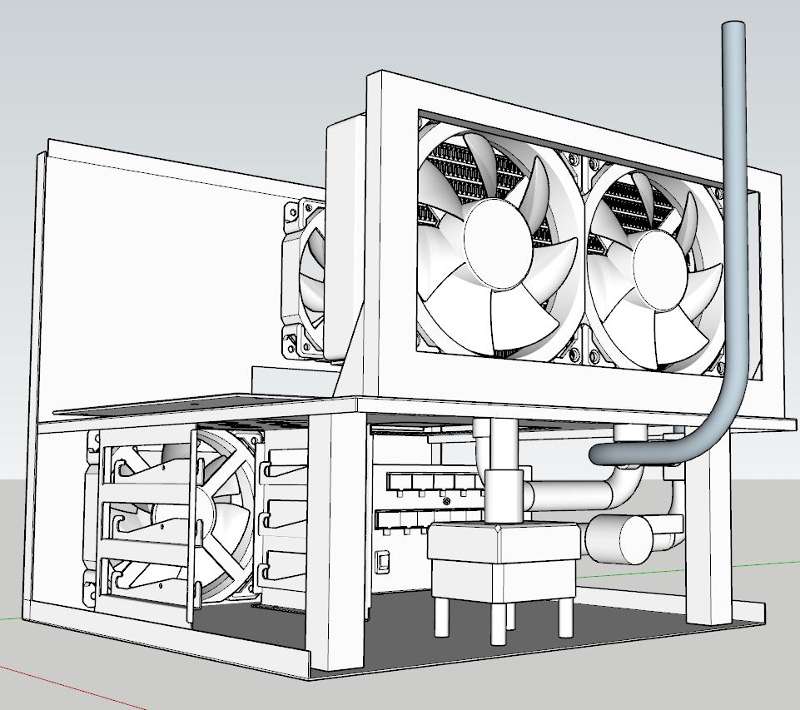
    An hour or so later, 8 little rods instead of actual screws, but to the needed length


    [Blocked Image: http://imagizer.imageshack.us/a/img924/4383/3gKaRo.jpg]


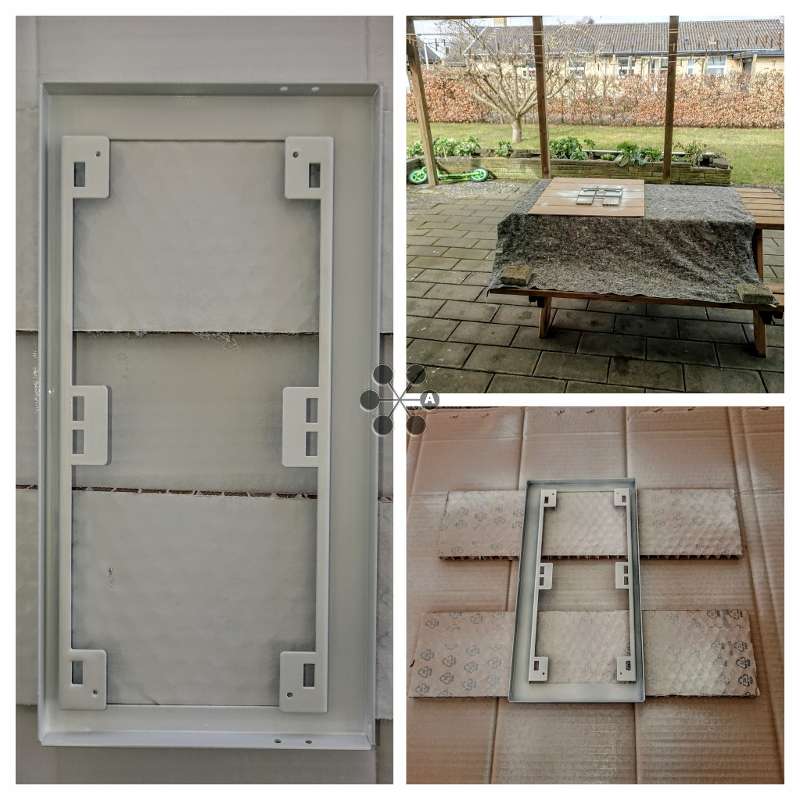
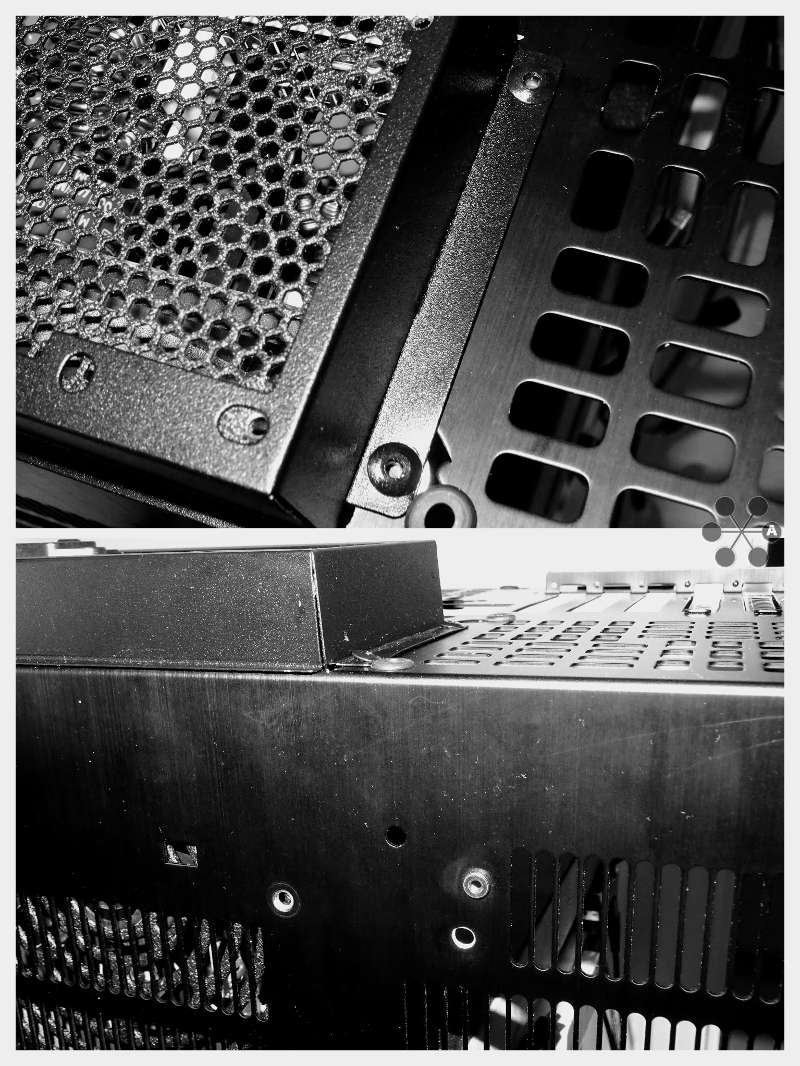
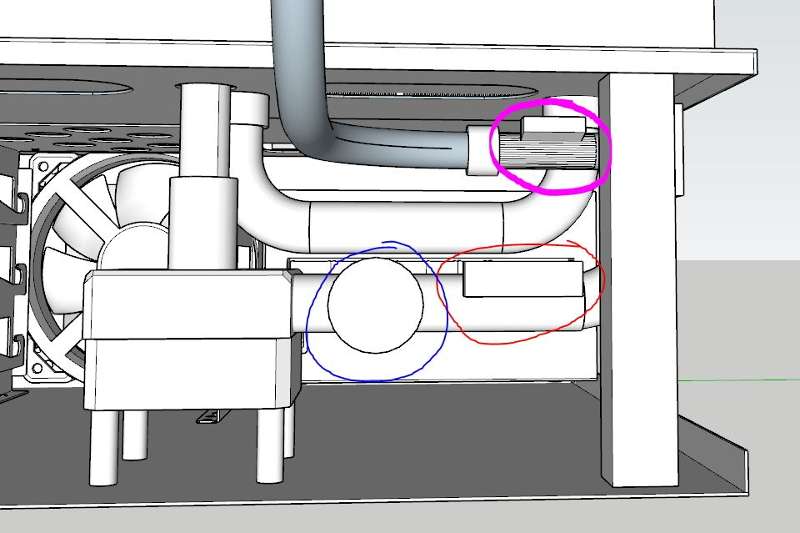
    The yellow marked one is the original piece they are all measured against, seems about right without using any ruler of caliper (because they have not showed up yet)


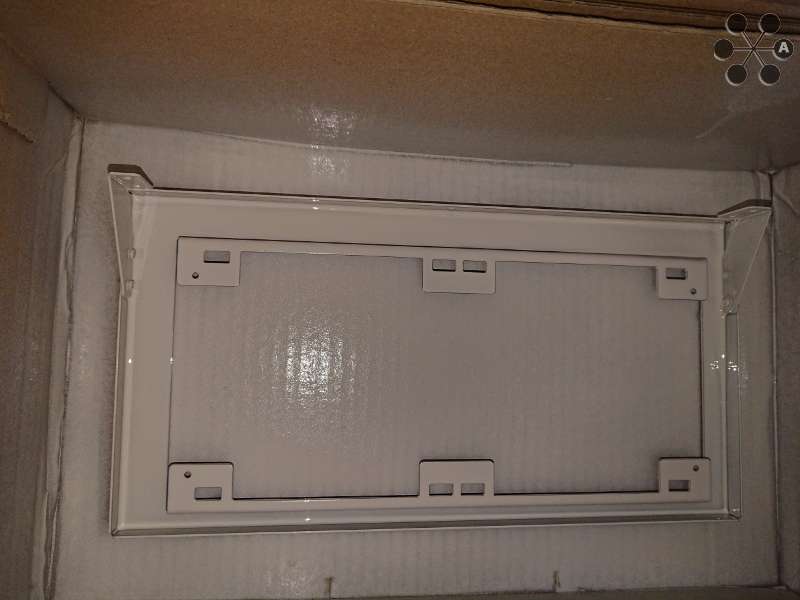
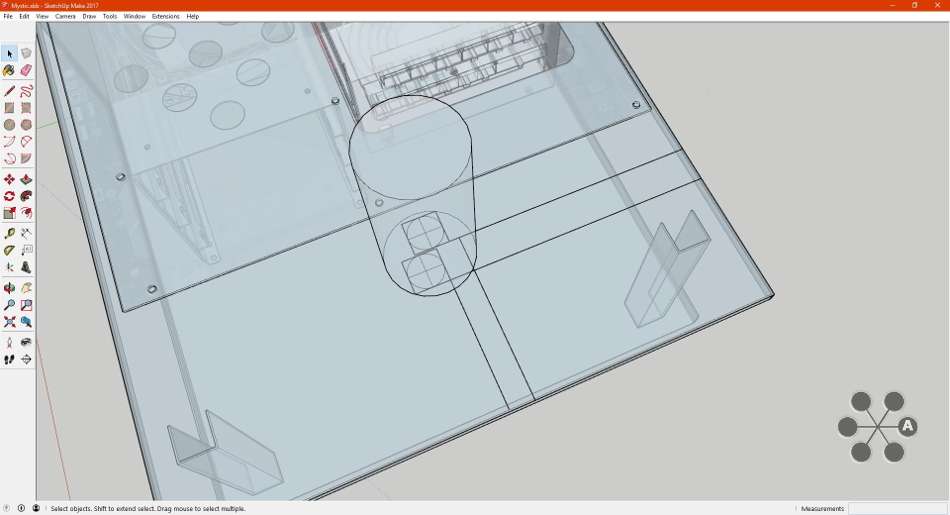
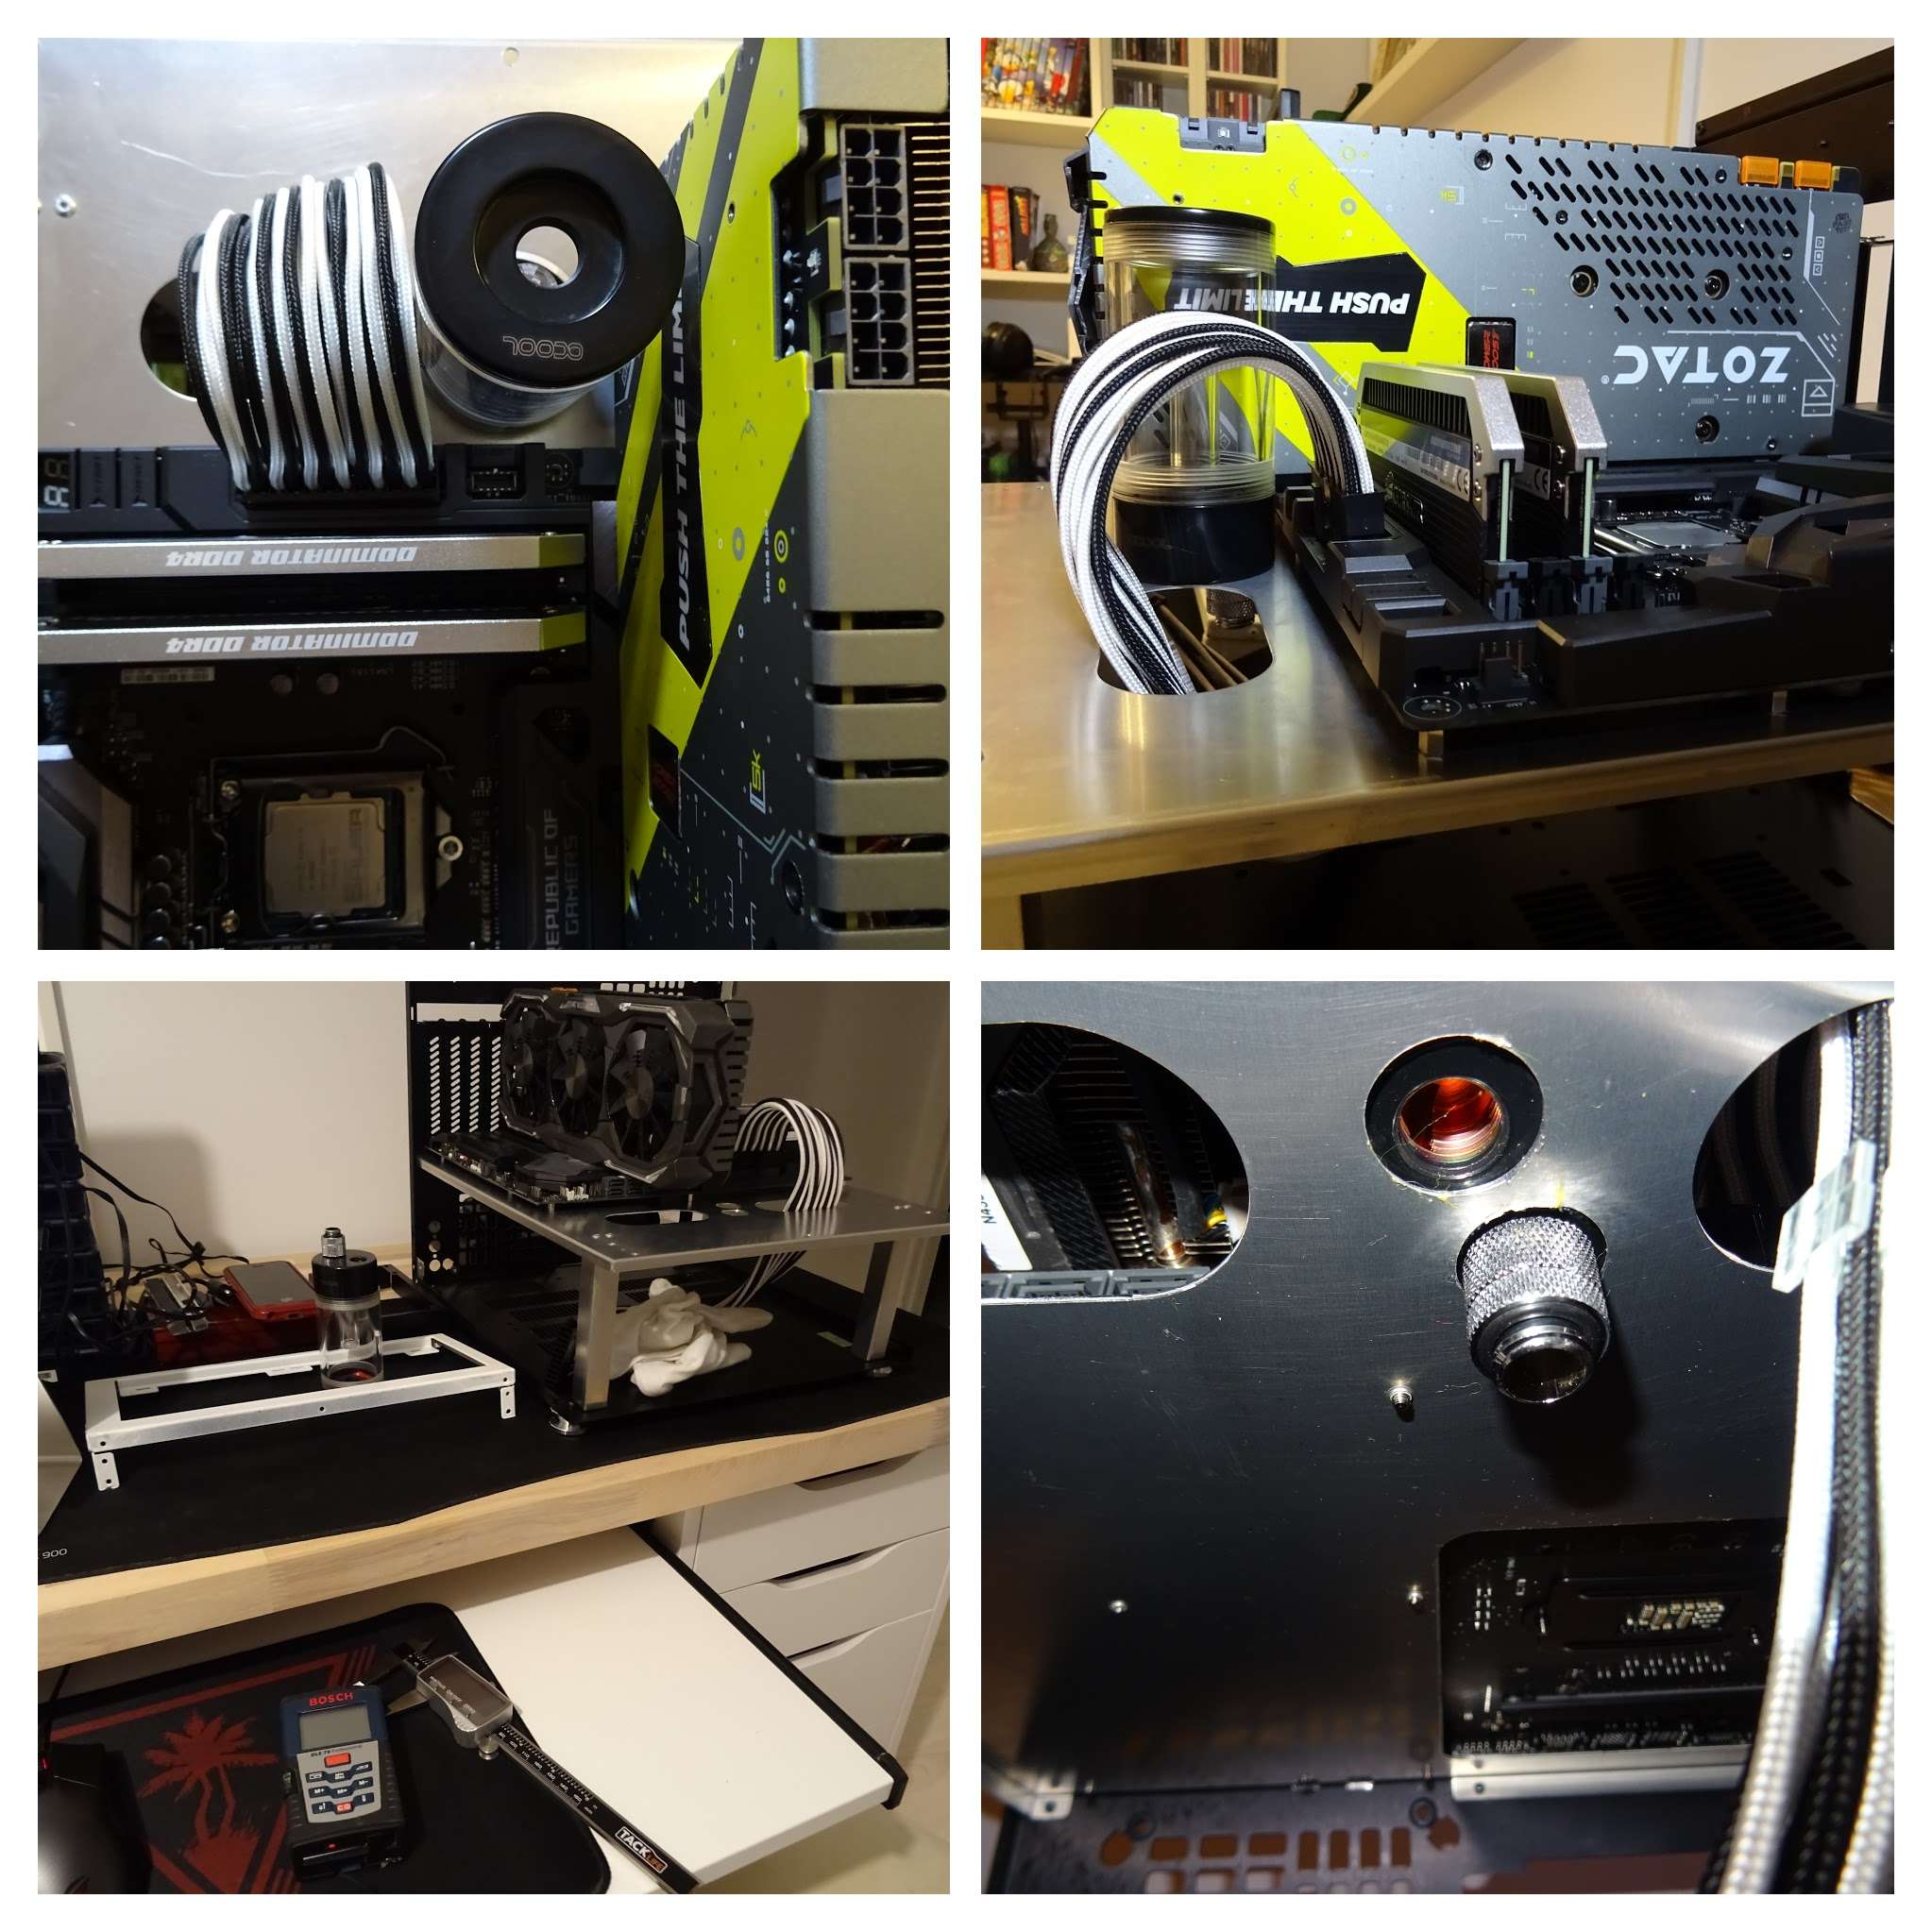
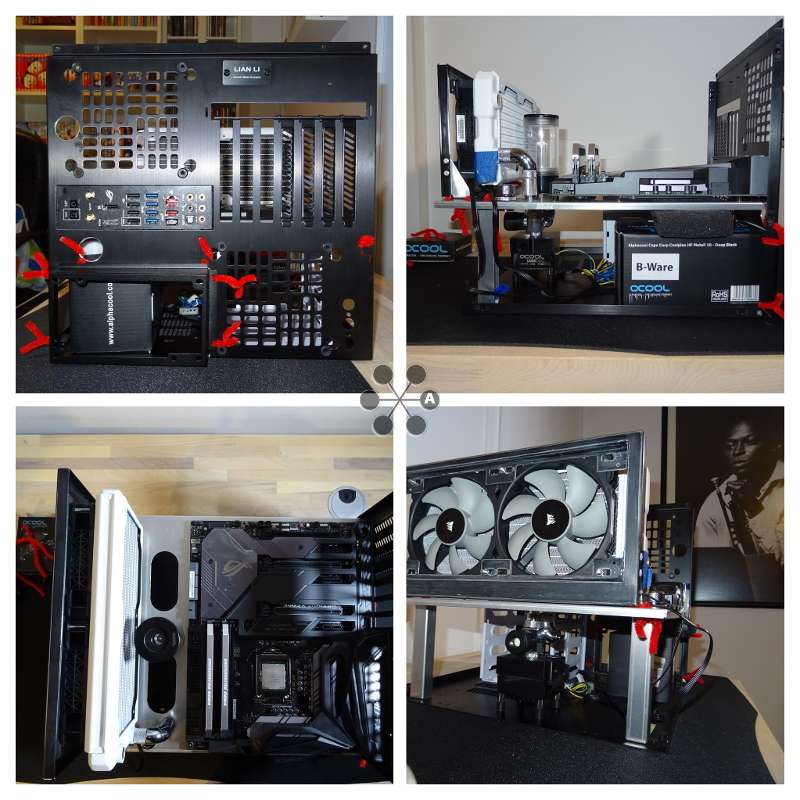
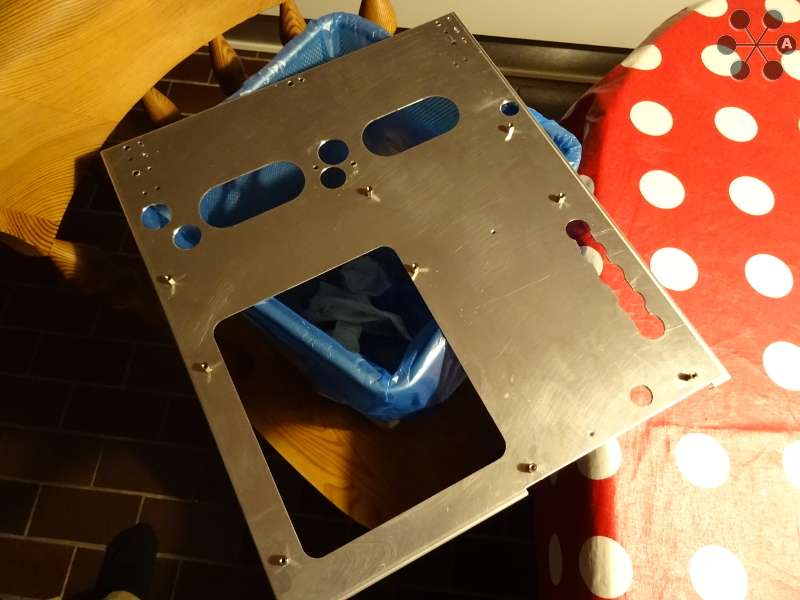
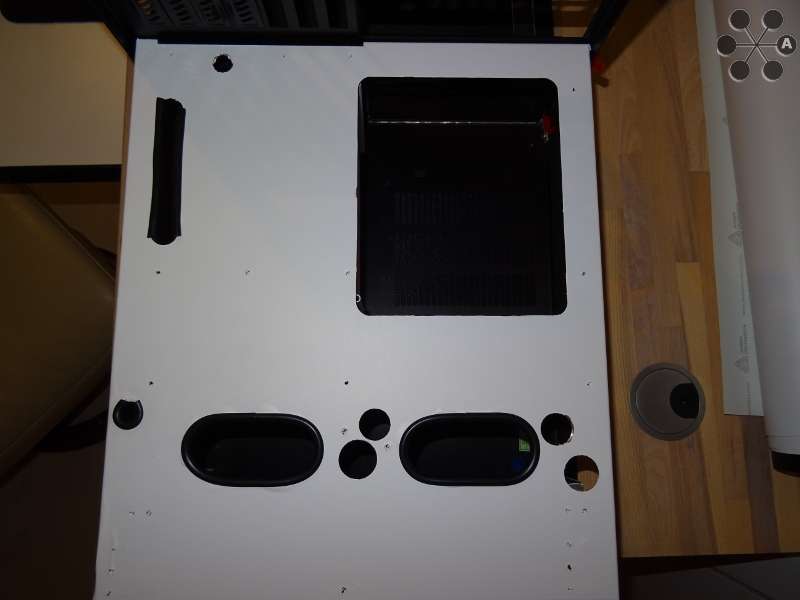
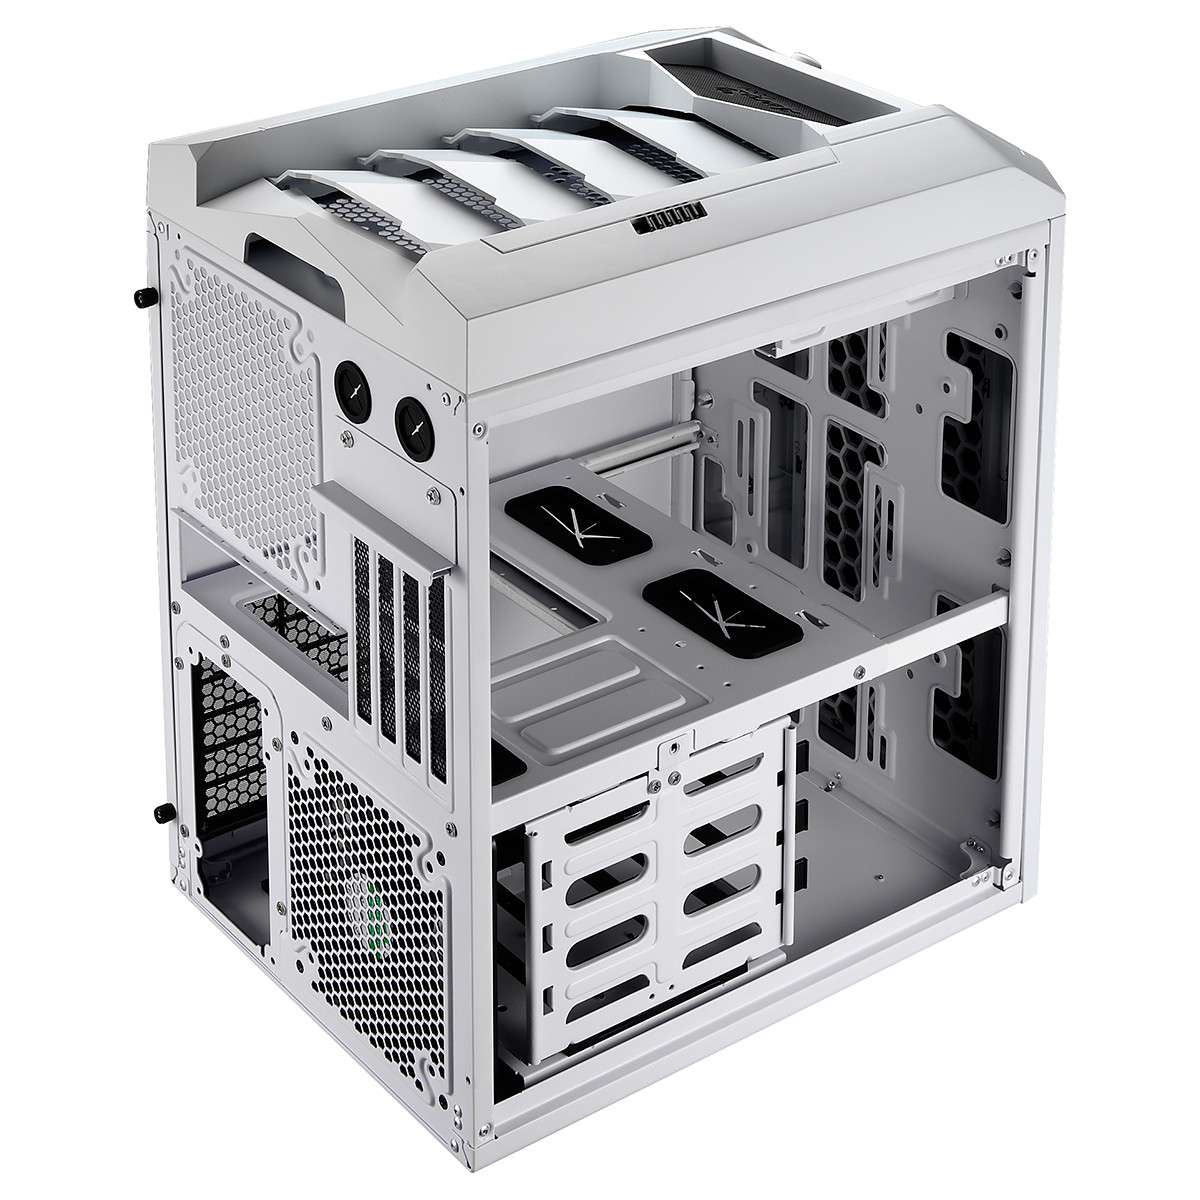
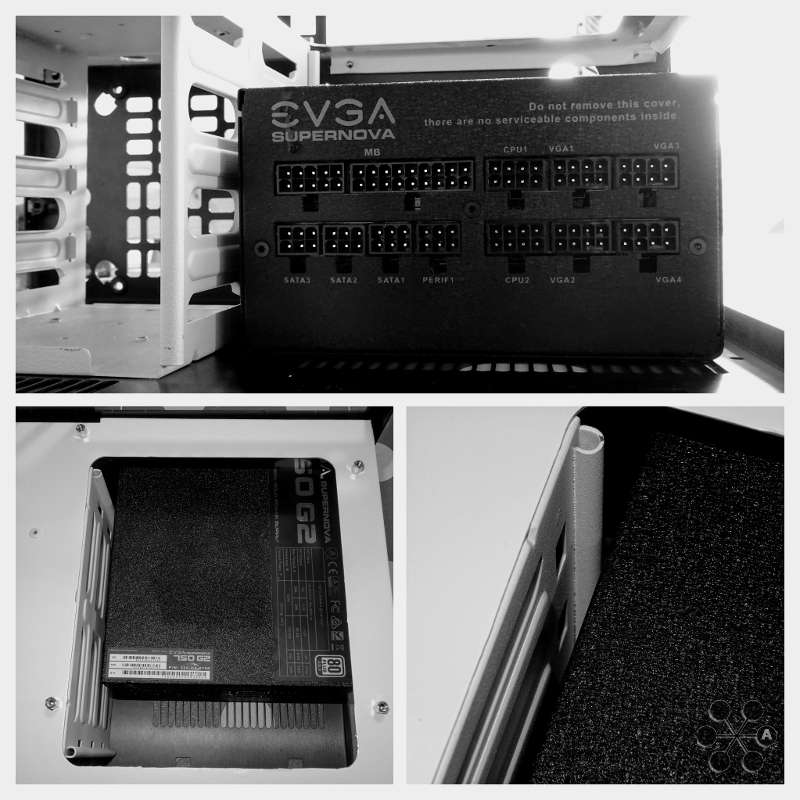
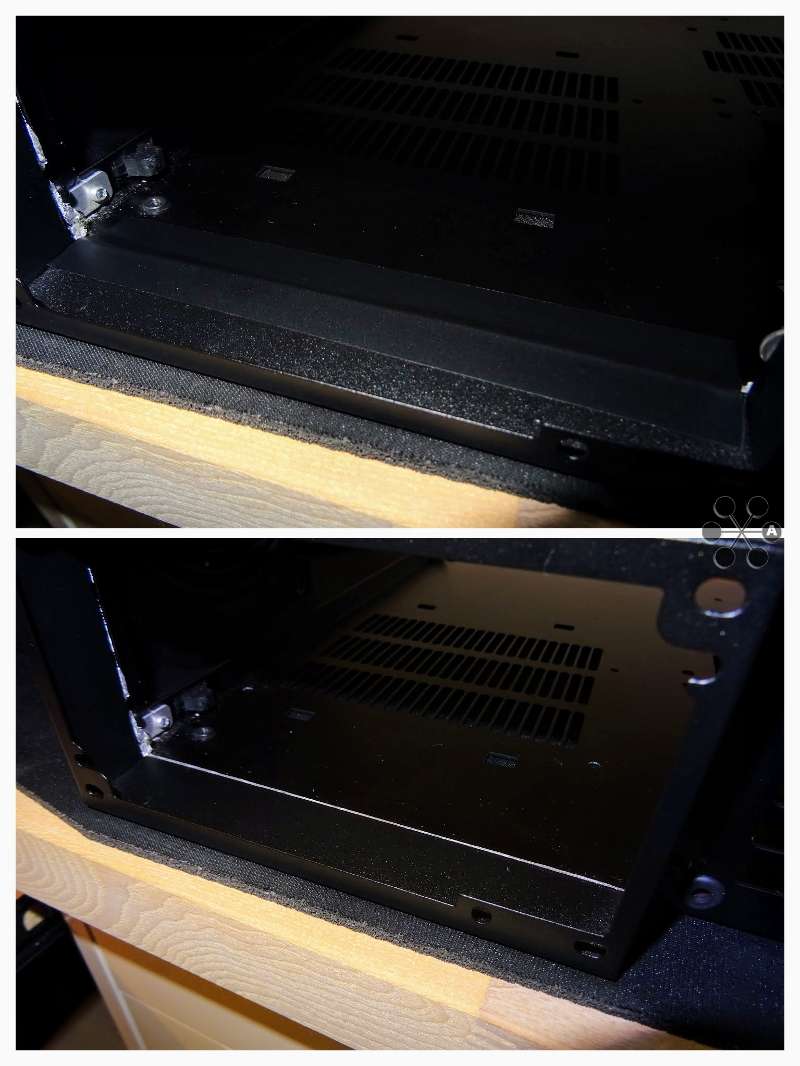
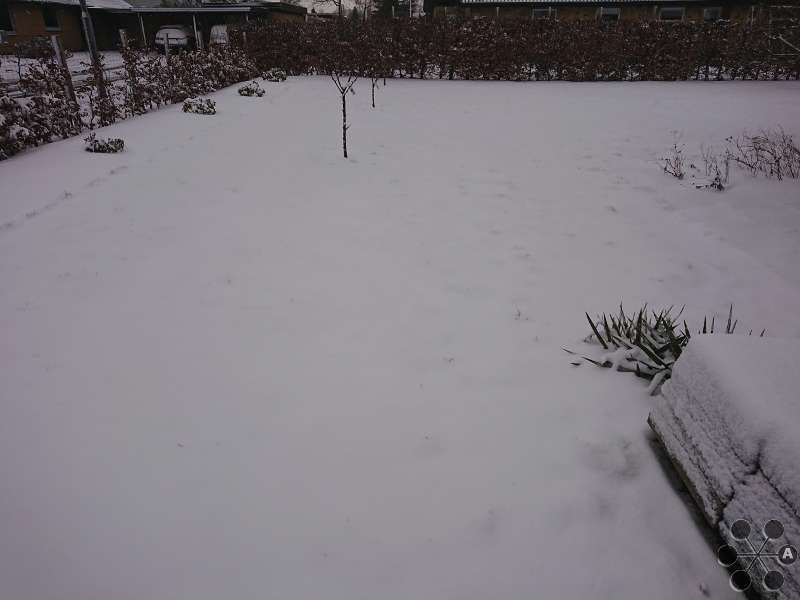
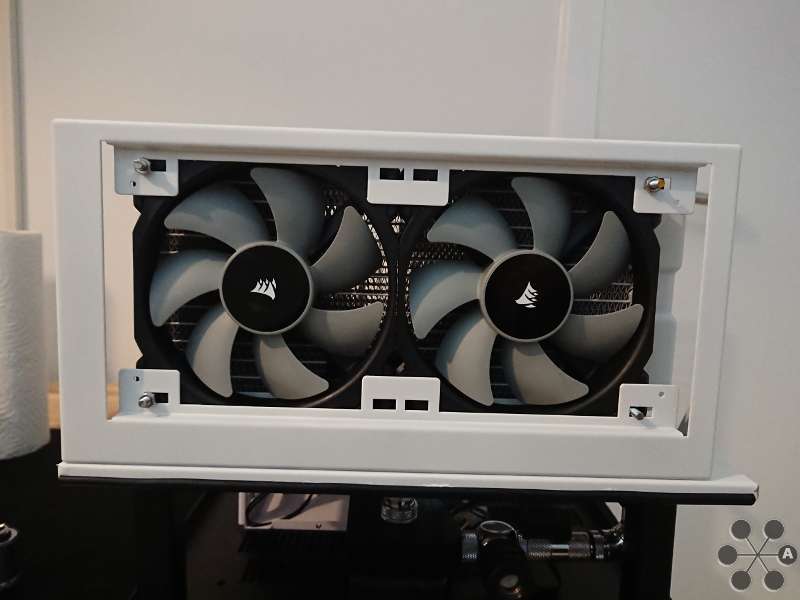
    Next step is to paint the rad mount and test fit some components, not exactly sure when I can paint as its snowing these days here and I have no option of painting in doors (wife would NEVER allow that)


    Stay tuned

  • Lets take a step back and look at my plan of attack for the loop


    [Blocked Image: http://imagizer.imageshack.us/a/img923/3418/4wBGYA.jpg
    I was watching a movie tonight and in the middle of that got an idea I think could both save me trouble and money, so win-win.


    I want to have brass tubes


    [Blocked Image: http://imagizer.imageshack.us/a/img923/8797/VuQIhv.jpg]


    and I don't want to bend them, because there basically there is only 2x 90degree bends (right there above the VRM, going to/from CPU) that would have to be done on the pipe, elsewhere I can use fittings, so one way to avoid bending the pipes would be to buy 90 degree fittings


    [Blocked Image: http://imagizer.imageshack.us/a/img923/3649/abA86c.jpg]


    So here is the idea, Alphacool actually makes the pipes pre-bend!
    I could just shorten them in the length I would need and bam it would look less clunky, take up less space, less chance of leaking (because I'm avoiding 4 fittings, be a more smooth bend for higher flow and lastly - be cheaper


    [Blocked Image: http://imagizer.imageshack.us/a/img924/9801/dJ0aYo.jpg]


    im tired, going to bed....

  • The past few days its been snowing and really cold here, so it kind of puts me on hold because what I need to do next is painting...
    My kids are enjoying it though.


    [Blocked Image: http://imagizer.imageshack.us/a/img924/5409/AhXRvA.png]


    [Blocked Image: http://imagizer.imageshack.us/a/img922/4919/seKnyZ.jpg]


    Packages arrived and I also found a few of my old cases, the Elite is donating its PSU mount for this build and the DS380 I hope I can sell at its just been collecting dust in the attic the past years.


    I only have a few minutes before I need to rush to work, but I managed today morning to paint a little on the fan mount, looks ok so far but cant wait to get it finished.
    First tried painting it hanging, but that was a total disaster and had to peel off and re do inside a box instead one side at a time.....
    Tedious work is not really my thing but I also want this to look good so have to deal with it.


    [Blocked Image: http://imagizer.imageshack.us/a/img924/4387/XBBmIs.jpg]


    Off I go need to catch a bus.

  • Super fed post!


    Jeg gætter på du er virkelig into at se maling tørre :)
    Jeg poster når der er noget at poste, og at poste det går lidt langsomt pga snevejr og at jeg gør hvad jeg kan syntes jeg var det værd.


    Det bliver meget mere interessant når jeg snart kan begynde at samle de bunker af dele jeg har liggende til dette build by now


    Stay tuned

  • A short update of actual work being done.
    I'm trying a new format to keep the posts shorter, hope you like it.


    [Blocked Image: http://imagizer.imageshack.us/a/img924/1264/DiYtRw.jpg
    I have now marked were I need to fit the extended PSU mount from the Elite case I had laying around, will give me more space in the basement for cables and stuff.
    I hope I will be able to bring out the rotary tool and slice it tomorrow.


    [Blocked Image: http://imagizer.imageshack.us/a/img922/3426/oanIyy.jpg
    I have now assembled the pump, complete with lithium grease, chrome bottom for maximum cooling of the motor and high pressure top (I wish I would have been able to find a metal top, but they are so hard to get by around here).
    It is the DDC 3.2 18W variant from Laing for a true high pressure system.
    By the way, in the first pics here the top was on the "wrong side", cables stuck out totally stupid in the case so have since moved the cable to the opposite side by turning the whole top around.


    [Blocked Image: http://imagizer.imageshack.us/a/img922/5523/UB9ON8.jpg
    After fixing the top issue on the pump I test fitted both the res and pump.
    I will soon have to figure out what fittings I will need.... Actually I just tried with my Barrow rotary fitting on the res, to align it proper in the hole I cut.
    That kind of gave me an idea, I could actually use Gorilla double sided tape to attach the res, and forget all about pass trough bulk head mounts?


    Im not sure how stable it would be when moving the system around, specially taken into consideration that I will use soft tubing in the basement (no need to waste money there on more expensive nice looking brass tubes)


    Also I am done painting the fan holder, its drying for the last time now.
    Its not perfect but it sure is white and thats what matters most to me.


    Also, I just found out that the hinges for the whole top cover on the case are iron, so the hinges them selves is magnetic!
    I wanted a quick way to be able to take the top off without needing to screw around with anything, so magnets is the way forward, just ordered some small but strong examples that should suffice for this exact purpose.


    It is slowly coming together. I really hope I be done in time for my easter holiday, I terrible miss to play games.

  • I have been cutting some more in the case today, no pics of that now, you will see in time.
    And I am yet again spending money on tiny little parts that will make a big difference, have ordered an assortment of white and black rivets for when the case is being assembled and some other small parts.
    Also, I'm working on a deal with my Barrow seller to get some 90 degree fittings and pass trough bulk heads for a good price, they are for now the only fittings I'm sure of as the rest rely on the size of these when fitted.


    My new tools, specially the digital caliper, made it possible for me to fine tune my 3D drawing, its really nice to be able to make exact plans


    [Blocked Image: http://imagizer.imageshack.us/a/img924/8790/pMCXVW.jpg]


    Now I am totally sure of that I have to mod my graphics card, its too big....
    And the res is a really snug fit in the spot I found


    [Blocked Image: http://imagizer.imageshack.us/a/img922/2031/x12HeZ.jpg]


    I might not even need soft tubing, but can make the whole basement potion with extension pieces of varying types, also not super sure were to place my temp sensor and flow sensor but it looks like there is space for the flow meter right on top of the pump, so its the slowest flowing speed and also to make sure the pump is working, if no flow in that part then there is for sure something wrong.
    The plexi on my flow sensor is not crystal clear so I would prefer to keep it in the basement and only use software to check flow rate.
    (flow meter is the square on top of the pump)


    [Blocked Image: http://imagizer.imageshack.us/a/img923/6680/QalOjD.jpg]


    This pump placement have a big benefit also in terms of IO, the front IO is in the right side, and like this its totally free to have cables and stuff in the space under the tubes.
    Also, I think of getting a drain valve to put in the area around here, juts not sure how. Was looking at this one that looks absolute amazing.


    Here is a better view of the fittings I will order today, 3x soft 90degree bends for maximum flow rate.


    [Blocked Image: http://imagizer.imageshack.us/a/img923/5175/wN0p6g.jpg]


    stay tuned for more real world updates

  • I honestly don't know how other people plan a loop, but other people have way more ordinary cases than I do...
    I think I have spend about 7 hours or so drawing since yesterday and finally I came up with an actual doable plan!
    Also, already ordered the fittings in the drawing so now I'm committed to stick with it, 'cos damn fittings are expensive!


    [Blocked Image: http://imagizer.imageshack.us/a/img923/4605/H6ZHUS.jpg]


    It kind of reminds me of 3D drawings of humans intestine system....

    The plan is a little more clear when you see it from behind were the PSU sits


    [Blocked Image: http://imagizer.imageshack.us/a/img924/3540/Xnr5JZ.jpg]


    I am currently reconsidering If I should just go for it and have some Cable Mod cables build, because if I'm going to use the extenders I originally thought then there will be a lot of unnecessary cables...
    That's to be undetermined until more assembly have been going on and I can better access the situation.


    By the way, the blank areas in the plan is to be determined later, as they rely on how the planned parts fit together, i'm not exactly sure of distances on those and don't want to order something wrong.


    to be continued................... :whistling:

  • I have a plan of finishing this build by Easter time, so better do all I can.


    So here is the final form of the plan for tubes on the upper level:


    [Blocked Image: http://imagizer.imageshack.us/a/img922/6518/j7hHOC.jpg]


    It don't look like much in 3D, but I am convinced its going to look really nice in real, brass tubes and all.
    Speaking of brass tubes, I have ordered a long list of parts...


    • Mayhems Blitz Pro
    • Magnets and glue
    • Sorting tray, black/white rivets and washers
    • Mouldable putty
    • Mini dual male fittings
    • Adjustable fittings, drain valve, extensions and more coolant
    • Barrow fittings from Mizucooling
    • Alphacool parts, brass tubes, compression fittings


    I can not really do much more until packages start to arrive.


    [Blocked Image: http://imagizer.imageshack.us/a/img922/3192/g0Uprm.jpg
    Here is the state the build was in when I was 3D drawing it, just to get a feel for how it will be, parts were not very well places, just a rough "sketch".


    Hope to see you again soon when more real world work have been done.

  • A minor update (mainly for myself) to keep track on all the parts I have coming in:


    • Mayhems Blitz Basic (arrived 12/3)
    • Magnets and glue (arrived 13/3)
    • Adjustable fittings, drain valve, extensions and more coolant (arrived 14/3)
    • Mini dual male fittings (arrived 15/3)
    • Barrow fittings from Mizucooling (arrived 15/3)
    • Alphacool parts, brass tubes, compression fittings (arrived 15/3)
    • Mouldable glue (sugru) (arrived 16/3)


    • Sorting tray, black/white rivets and washers
    • Mini gpu PWM cable (so I can use other fans on the graphics card)
    • PWM splitters (there is going to be somewhere between 10-12 fans in total in this build, because I can and because I need the airflow as it sits inside a closet)
    • Special end fitting for my fill port on reservoir (this is going to look rather good I hope, stay tuned to see)
    • Fan brackets for mounting fans in PCI slots (I have 3 separate orders on the way I think, because these things a little harder to find than you might think)
    • Kapton tape, high heat resistant tape for my GPU when I put liquid metal on it


    There is probably something I have forgotten...
    My email inbox and my home office is both a big mess right now until everything can actually be assembled....


    On top of these parts I know I need one of the new Cable Mod Pro cable kits, will look so much better. But I'm trying to sell some things before I order that, as now I'm really starting to stretch the budget. Wish I was sponsored but no.


    Will see you guys when I have more to actually show.

  • I received all my fittings I have ordered so far. It all looks amazing! So now I just need all the more random parts to make the build come together.
    Will put many more sexy pictures later, but just a few teasers for now:


    [Blocked Image: http://imagizer.imageshack.us/a/img924/940/IsRO5M.jpg]


    My Barrow parts from eBay Seller Mizocooling, thanks Mark these things look just stunning! (seriously check out his store for incredible looking parts at very reasonable prices)


    [Blocked Image: http://imagizer.imageshack.us/a/img922/9874/3sJ5p2.jpg]


    Test fit, it actually looks like my Sketchup drawings were correct... In this pic its not in the totally right position, because I have not yet figured out were to make a hole for the bulk head fittings.
    The Thermaltake valve is really really nice quality, has a good heft and looks super serious, actually looking forward till the first time I need to drain the system


    Also, decided to strip down the front mount as there were a few imperfections in the white paint (see one of them in the picture), will redo it from the ground up with sanding, primer and then paint in more ideal heated conditions this time (thought I could do without but no), I have to make it look good.
    You know what they say, 3rd time is a charm (and yes this is the 3rd time i'm painting that part...)


    [Blocked Image: http://imagizer.imageshack.us/a/img922/3738/uucLbY.jpg]


    Stay tuned, its getting close now...

  • [Blocked Image: http://imagizer.imageshack.us/a/img924/4332/NPVwjw.jpg]


    For once, a real update with actual progress there have a resemblance to the 3D mock ups.


    Today I dismantled the last pieces of my case:
    [Blocked Image: http://imagizer.imageshack.us/a/img922/3986/mw2i0K.jpg]


    I can use the same type of fuzzy sticks I used earlier on to reassemble the case into a mock, to make sure everything fits were it needs to be, before I put it together with rivets (whenever they arrive)


    [Blocked Image: http://imagizer.imageshack.us/a/img923/140/eRv6MZ.jpg
    If you go back and see, these looks very similar to the SketchUp drawings....
    Like this once to give an example:


    [Blocked Image: http://imagizer.imageshack.us/a/img923/6680/QalOjD.jpg]


    As you can maybe see, I will need to push the front assemble little to the left side, to make the piping work both ways, in and out trough the basement.
    I will not imagine that's going to make a big deal in terms of cooling degrade because the fans are shifted little to one side, actually more concerned about how the LED frames will look little to one side.... Lets wait and see


    [Blocked Image: http://imagizer.imageshack.us/a/img922/3641/HhFnJ2.jpg
    The pump and valve looks amazing I think.....


    By the way, I tried painting the fan mount again (3rd time) and it again went into total disaster. I kind of blame the weather, these temperatures we have here now are not ideal for any kind of paint job, even with a heated can of paint the drying screws up a little and it looked not ideal.
    I took a good look on the whole assembly when I cleaned it and its actually made of 1 piece of bend steel... I can vinyl wrap this instead! X-acto knife and all. Just need to order the vinyl


    Stay tuned, my easter deadline is coming soon and I sure hope the last packages arrive before that, I surely miss to play games.

  • Today I test fitted more of the case, here you see it with one side and the roof/front combo "attached" (hinges was not on)


    [Blocked Image: http://imagizer.imageshack.us/a/img923/3996/4vG2cU.jpg]


    It actually made it clear to me, that even when I move the fan assembly slight to one side, it will not impact airflow, as the perforated holes are wider than the assembly itself
    See here I tried outlining the fans with green, and the free space next to fans were the rad is with pink.


    [Blocked Image: http://imagizer.imageshack.us/a/img922/5708/vYeohQ.jpg]


    Also, made a bunch of new holes in the motherboard tray, for the last bulk head pass troughs, for easy cable routing, and for the rivets in the fan mount.
    Only need to cut out the remaining space there in one side, were a bunch of fan cables, front panel audio and other things have to route trough, plus I need to tap 2 holes into the res, to secure it in the case.


    [Blocked Image: http://imagizer.imageshack.us/a/img923/5333/aMjin3.jpg]


    You might think it looks rather simple the mod I make, but there is super limited space for a full watercooled ATX setup in this case and it is definitely not build with water cooling or cable management in mind originally, that's what I'm trying to achieve, its pretty much a Mission Impossible.
    By combining parts from 3 separate computer cases and a lot of specialty pieces this will in the end be a highly unique PC that don't look like much on the outside (almost a sleeper PC), but really shines on the inside when you pull off the top/front which will be magnetically attached.
    I'm actually thinking of getting some addressable LED strips to make it even more 2018....


    Just ordered my Cable Mod cables, and am about to order vinyl wrap.
    Things are going in the right direction so stay tuned

  • Plans are starting to align with reality.


    Today I cut out what I wanted there in the side, and I drilled holes to mount the res properly


    [Blocked Image: http://imagizer.imageshack.us/a/img924/8483/3Vd6Ep.jpg]


    Speaking of drilling hole in the res, I have never drilled in brass before, and that dust it damn fine, looks almost like gold dust!
    Not like aluminium that comes off in long threads or iron that makes small hard pointy pieces.
    Also, I think I found out why the res is a B-grade, it's not totally painted inside, there is a strange blob were the brass shines trough. Very difficult to see when its assembled and it actually looks kind of cool imo anyway.
    I have threaded it with two M4 holes, because I think I can re-use some of the rad screws im not going to use on the rad.


    [Blocked Image: http://imagizer.imageshack.us/a/img924/9770/qgdneN.jpg]
    In other news, I have received the rivets, a wide assortment of sizes in black and white
    I actually ordered the rivets and the box in the same place, but apparently they don't fit each other so had to mod the box and make the rooms wider, by combining two compartments at a time, then it fits nicely.


    [Blocked Image: http://imagizer.imageshack.us/a/img922/5666/Ikg8nN.jpg]


    Still waiting for a few parts

    • Mini gpu PWM cable (so I can use other fans on the graphics card)
    • PWM splitters (there is going to be somewhere between 10-12 fans in total in this build, because I can and because I need the airflow as it sits inside a closet)
    • Special end fitting for my fill port on reservoir (this is going to look rather good I hope, stay tuned to see)
    • Fan brackets for mounting fans in PCI slots (I have 3 separate orders on the way I think, because these things a little harder to find than you might think)
    • Kapton tape, high heat resistant tape for my GPU when I put liquid metal on it
    • Cable Mod cables


    My vinyl also arrived, so I had time to fit some of it on the motherboard tray today


    I'm very happy with I went this route instead of struggling more with painting. Now its white and black, the whole intention of this build.


    [Blocked Image: http://imagizer.imageshack.us/a/img923/9919/SfnV6j.jpg]


    [Blocked Image: http://imagizer.imageshack.us/a/img923/9492/b3o7mm.jpg]


    I'm hoping it will go as well too when I fit it on the fan mount.... the vinyl is thicker than I wanted, so it dont bends so well, but lets see, still sure it will end better than my paint job did.


    Stay tuned for more assembly

  • I'm watching the "Live: #RIPLTT Taking The OC Crown from LinusTechTips" over at YT and came to think about I actually never measured the lengths on the pipes in the build..... can see I actually need about 10cm....
    Doh!


    Also, I don't have a good way of cutting brass tubes and a reamer....


    So I headed over to aquatuning once more and ordered all that, plus I decided to get a white Eislicht LED panel, not sure where to apply it, but it looks awesome.
    I have to stop buying things, the budget is running out by now. Wish I was sponsored or anything but sadly no.


    stay tuned

  • The list of parts I wait for is getting shorter and shorter, now we are left with things from China that seems to take forever to reach my destination here in Denmark

    • Mini gpu PWM cable (so I can use other fans on the graphics card)
    • PWM splitters (there is going to be somewhere between 10-12 fans in total in this build, because I can and because I need the airflow as it sits inside a closet)
    • Special end fitting for my fill port on reservoir (this is going to look rather good I hope, stay tuned to see)
    • Fan brackets for mounting fans in PCI slots (I have 3 separate orders on the way I think, because these things a little harder to find than you might think)
    • Kapton tape, high heat resistant tape for my GPU when I put liquid metal on it


    In the meantime I try to do as much as I can.


    My Alphacool parts arrived, extra tubing (that looks amazing by the way), heavy duty reamer, high quality cutter, led panel and extension for it


    [Blocked Image: http://imagizer.imageshack.us/a/img922/8752/8sHUHr.jpg]


    Over the weekend I tried in 3 different ways to put vinyl on the front fan mount


    [Blocked Image: http://imagizer.imageshack.us/a/img924/9024/p9Cw5r.jpg]
    Let me say it simple, it did not go well.....


    So instead I used vinyl on getting the lower legs, that hold up the motherboard tray, done in black (normally they are metallic silver, aluminum or steel, not sure).
    The original color is still on the inside were no one will see it after its mounted


    [Blocked Image: http://imagizer.imageshack.us/a/img924/1379/1Bdflo.jpg]
    That turned out just perfect!


    Today I have been home alone most of the day, because of Easter, no kids and no wife.
    So I headed out and bought new cans of plasti dip knock off and did ever trick in the book: I put the cans in warm water. I shook it for over a minute before use, I heated the metal that was going to be painted, I used a table as my work bench, so the angle and work height is more natural, I used a big piece of cardboard on top of a blanket, so I could move the cardboard around and hit it from all directions.
    I waited about 1 hour between every layer of paint. Painted from 10:00-15:00, so in my match that equals 5 layers and the result is damn near perfect!


    [Blocked Image: http://imagizer.imageshack.us/a/img922/6249/BcNLSn.jpg]


    Picture on the cardboard is the 2nd layer when it started to fill it out, picture on the left is the finished result.
    Now the fan holder is here in the house over night to fully dry and the tomorrow I will figure out how to paint the more crucial front side.
    Stupid part is the whole assembly is not going to be seen much when everything is mounted on it, it's more because some parts are visible and those parts have to look nice, else it all falls to the ground.


    It's starting to take shape now and come to life as I envisioned it but good God there are many little pieces and parts that need to be done in a specific order.


    Tomorrow I hope I will have time to fit the PSU extension mount, as I wait for paint to dry.
    One of my headaches there is that I need to fabricate some kind of metal plate, as one of the holes dont line up with anything on the case, so I need it to be clamped in from both sides with the rivet that supposed to sit there, can not really explain it but it's an annoying little detail, will show in a picture after it's done to spare you my pain.


    Stay tuned for more actual case mods!


    btw, the Cable Mod cables have also arrived, I just have not unpacked it yet because I want to do the PSU mount before trying things with the PSU.

  • "Whats on the menu today Dad" - Casemod!


    [Blocked Image: http://imagizer.imageshack.us/a/img922/2088/gp7Q2c.jpg

    First order of business, painting the front fan mount on the front side - but when I was waiting for coats to dry and re-coat, I did a lot of other things.


    [Blocked Image: http://imagizer.imageshack.us/a/img923/4527/PngUcG.jpg]


    Like riveting in the hard drive rack from an Aerocool case, I used before I bought this one, very similar internal design, but terrible outside and even worse quality or lack there off.
    Found out something was wrong with my riveting gun, it left nasty scratches on my nice white rivets.


    Test fitted the PSU, and it is sure a tight space!


    [Blocked Image: http://imagizer.imageshack.us/a/img922/1425/BPqfNz.jpg]


    I had totally forgotten, but I have removed the spacers the PSU used to lay down on, so now I have this much more space above it until it reaches the motherboard level.


    [Blocked Image: http://imagizer.imageshack.us/a/img923/5769/vlUOZE.jpg]


    And that space is going to come in handy, because I can see now I have to turn the PSU around so the intake fan is inside the case.
    Not ideal but can't imagine its a big deal, the fan in it used to rarely spin in my last system with the same PSU, it's 750 Watt and the system should be nowhere near reaching that much power use.


    As I have move the PSU back, I also forgot I am blocking some of the vent holes below it.


    [Blocked Image: http://imagizer.imageshack.us/a/img922/7498/wLlt9z.jpg]


    It's about 3 cm or so that I'm extending the case, have not measured it today. Its a part from a Coolermaster Elite 110 case I never got to use, I just bought it because it was dirt cheap and some of the parts in it have become mods in my various builds, including this now.


    [Blocked Image: http://imagizer.imageshack.us/a/img924/5117/CAqodq.jpg]


    It's going to give me room in front of the PSU for all the tons of cables and also because the whole pump assembly is there taking up space I really needed to do something, this is a perfect solution with a cut out and some rivets and hey presto, Lian Li PC-V33 Extended Ltd. Ed.


    Speaking about cutout, as I lowered the PSU level, there is a nasty edge there now from the Dremel work. It's files down so it's actually nicely smooth to the touch, I would just hate if it somehow ended up scratching anything.
    So I still have some vinyl left over and bam, that's also fixed. Never going to be seen, but here you go:


    [Blocked Image: http://imagizer.imageshack.us/a/img923/3936/4wzzED.jpg
    Lower one is before, upper one is after.


    I found out, the distance I have lowered the PSU is almost dead on the same distance the rubber dampers height is, used to be on top of the silvery thing I was holding in a picture a little up from here.
    So, a little Gorilla glue later and they are re-positioned in the case yet again helping the PSU being level and give less vibration.
    Even the Gorilla glue have excellent vibration dampener probabilities, so it should work as intended.


    [Blocked Image: http://imagizer.imageshack.us/a/img923/1503/9pPkx7.jpg]


    If this is not a casemod by now, then I don't know what....


    I received a new delivery today, my mini 4 pin to PWM splitter, so I can use normal 120mm fans on my GPU.
    Still nothing from my china orders, it's today 13 days since ordered and Im about to give up and spend a ton of money on essentially the same things here closer to home.
    Well there is more to do as I wait, so stay tuned for a little bit more tomorrow, I know I will not have as much time but I will squeeze some in.
    For once, I know I'm going to mount the dried front mount, it looks soo good in white!


    Stay tuned for more

    (funny how all the random pictures I have taken today actually tells the days work nicely, was not sure they would but hey, it worked)

  • Im still surprised how passive the people who come to see my work here is, not many comments.
    It's not like no one have seen it, close to 8.000 people, but less than 50 comments in total.
    Anyway, it's not going to stop me, hope I can inspire some of you.


    Today it's going to be a early update, I don't have much time today.
    Sorry for the quality of the pictures, my camera have run out of battery so was forced to use the phone.


    It's snowing again


    [Blocked Image: http://imagizer.imageshack.us/a/img924/7628/rj1S1w.jpg]


    I have mounted the now white front fan mount (this is just test fitting the fans and rad, but the mount is permanently on now).
    Fun fact, I can not mount the rad without un-mounting the glass tube from the res, that's how little space there is in this machine.


    [Blocked Image: http://imagizer.imageshack.us/a/img922/558/Co8hSI.jpg]


    Actually had some little trouble with my rivet gun again, I ended up scratching the otherwise perfect black vinyl I have put on the legs


    [Blocked Image: http://imagizer.imageshack.us/a/img924/7320/wlpkmM.jpg]


    So had to re-vinyl it


    [Blocked Image: http://imagizer.imageshack.us/a/img922/609/ue9jIR.jpg]


    Not as 100% perfect as first time, but 99% of the way is ok.


    I went back to my original plan of having the flow meter up at the rad, first of all, it gives me more space below, secondly, its plastic, so rather have it in the end of the loop were the pressure is not super strong and I can better see if it one day decides to crack.


    [Blocked Image: http://imagizer.imageshack.us/a/img923/4994/m7SXDf.jpg]


    It's going to look something like this


    [Blocked Image: http://imagizer.imageshack.us/a/img923/9220/OXptjH.jpg]


    You might wonder what the thing in front of the case is, that's because I was inspired by Linus tech tips latest video of cleaning a loop, and have been tinkering all morning with how to make it much easier to empty the loop properly.


    I'm going to use two ball valves and a hose as a kind of chimney when needed, so I can blow into the hose and fill the loop with air, as the liquid runs out my drain valve right in front of the pump.


    [Blocked Image: http://imagizer.imageshack.us/a/img924/3249/fqCeTv.jpg]


    So one ball valve is right after the drain valve, so I can close the loop off in one end there.
    The second ball valve is on my T connector right under the motherboard tray, so I can unscrew a cap, screw on a hose, open the valve and blow air in.


    [Blocked Image: http://imagizer.imageshack.us/a/img923/5299/9cDPSF.jpg]


    Blue is drain valve, red is stop valve for closing off the loop, pink is air valve for blowing trough.


    It looks a little like this


    [Blocked Image: http://imagizer.imageshack.us/a/img923/395/y8teYa.jpg]


    The tiny little valve I currently have is going to be used as air valve, as it's very restrictive!


    So I have ordered the parts I need and pretty much given up on my china orders now.
    I want to finish this build....


    [Blocked Image: http://imagizer.imageshack.us/a/img923/5832/Sxrvkr.jpg]


    Oh yes, as you can see there is going to be even more light inside.
    So both RGB LED, white LED panel, white LED single light and digital addressable LEDs.


    Point is, the RGB LED fan frames I already have is going in front of the front fans.
    The white LED panel is going somewhere under the motherboard tray, kind of like a work light, so I can better see whats going on there when needed, like checking for leaks and whatnot.
    The single white LED is going to subtle light the res from inside, wonder how well it will work, but only one way to find out.
    The digital adressable LEDs are going on the GPU fans, want it to show temp, maybe one showing CPU temp the other GPU temp or something like that, not sure yet.


    I can start feeling it, im getting close to finishing.
    A few more packages and like a week or two more of work and this machine is ready for battle.


    Stay tuned (I promise better pictures next time).